
A simple process one can do while social distancing inspired by the cyanotypes of Anna Atkins
Guest blogger Matt Cummings is an artist and Assistant Preparator at SCMA
Dispatches from Isolation: Or, a Simple Process one can do while social distancing inspired by the cyanotypes of Anna Atkins.
Working from home when you’re an art preparator is a complicated proposition. I should start by clarifying because many people don’t even realize my job exists. An art preparator, or art handler, does all the work behind the scenes to prepare and install the art you see when you visit a museum. Matting, framing, hanging, moving, lighting, painting, building, designing – you name it. A large proportion of preparators out there are artists, and frequently we bring the knowledge we’ve gained making our own art to the work we do in the museum – or in this case, out of the museum.
One of the processes I work in is called Cyanotype.
![]()
![]()
![]()
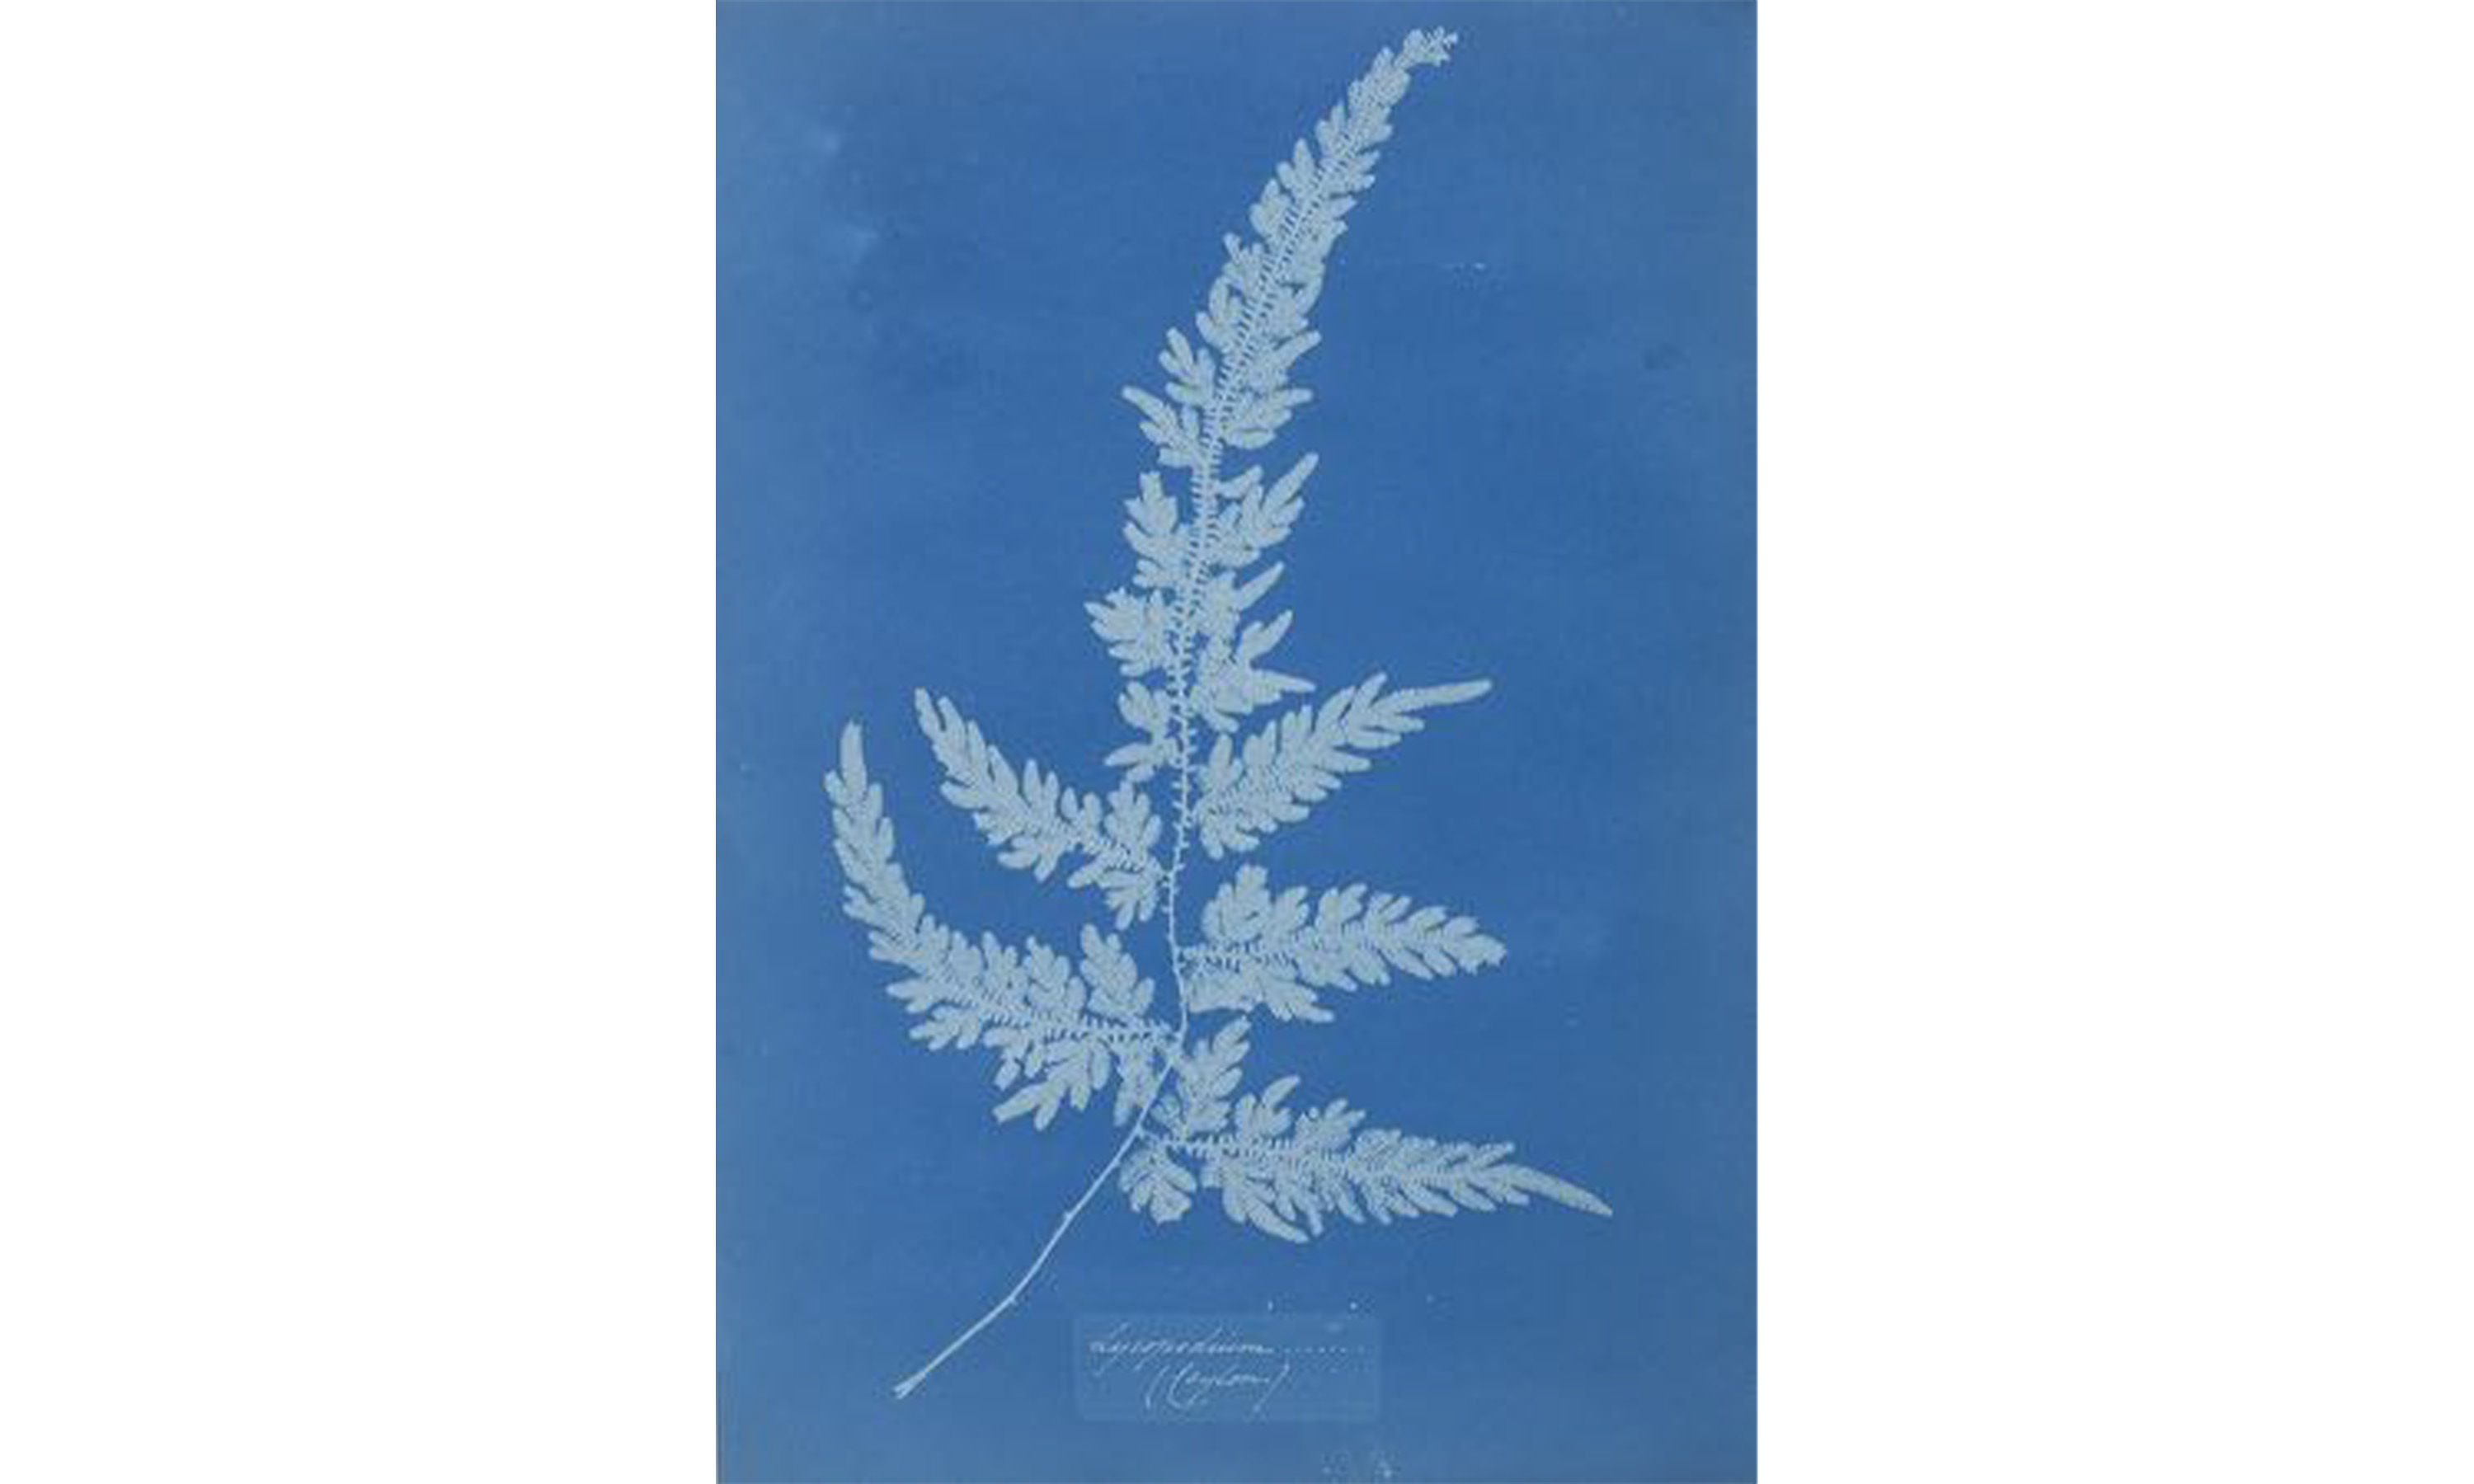
This photo from the SCMA collection by Anna Atkins (1799–1871) is a cyanotype. Atkins was an English botanist and a friend of Sir John Herschel, inventor of the cyanotype process. She is widely considered to be the first woman photographer. Atkins made simple photograms—photographs made without a camera—by placing bits of flora directly on specially coated papers and exposing them to the sun. Using this process she published the first book of photography, British Algae (1843).
Developed in 1842, cyanotype is one of the oldest photographic processes and one of the more approachable methods available. You don’t even need a camera! Historically, the process was chiefly used to reproduce engineering and architectural drawings. The characteristic blue color of cyanotypes is where the name blueprints comes from. An original schematic or technical drawing would act as a negative and simple contact prints would be produced to distribute that design among workers on a job site or in a factory. Compared to the extant photographic processes at the time, which used silver, the iron-based cyanotype process was much cheaper. It is also simpler and safer because the prints are developed using only water. The solution to produce cyanotypes is a two part mixture of ferric ammonium citrate and potassium ferricyanide. The oxidation of potassium ferricyanide produces the pigment known as “Prussian Blue,” which accounts for the signature blue of cyanotypes.
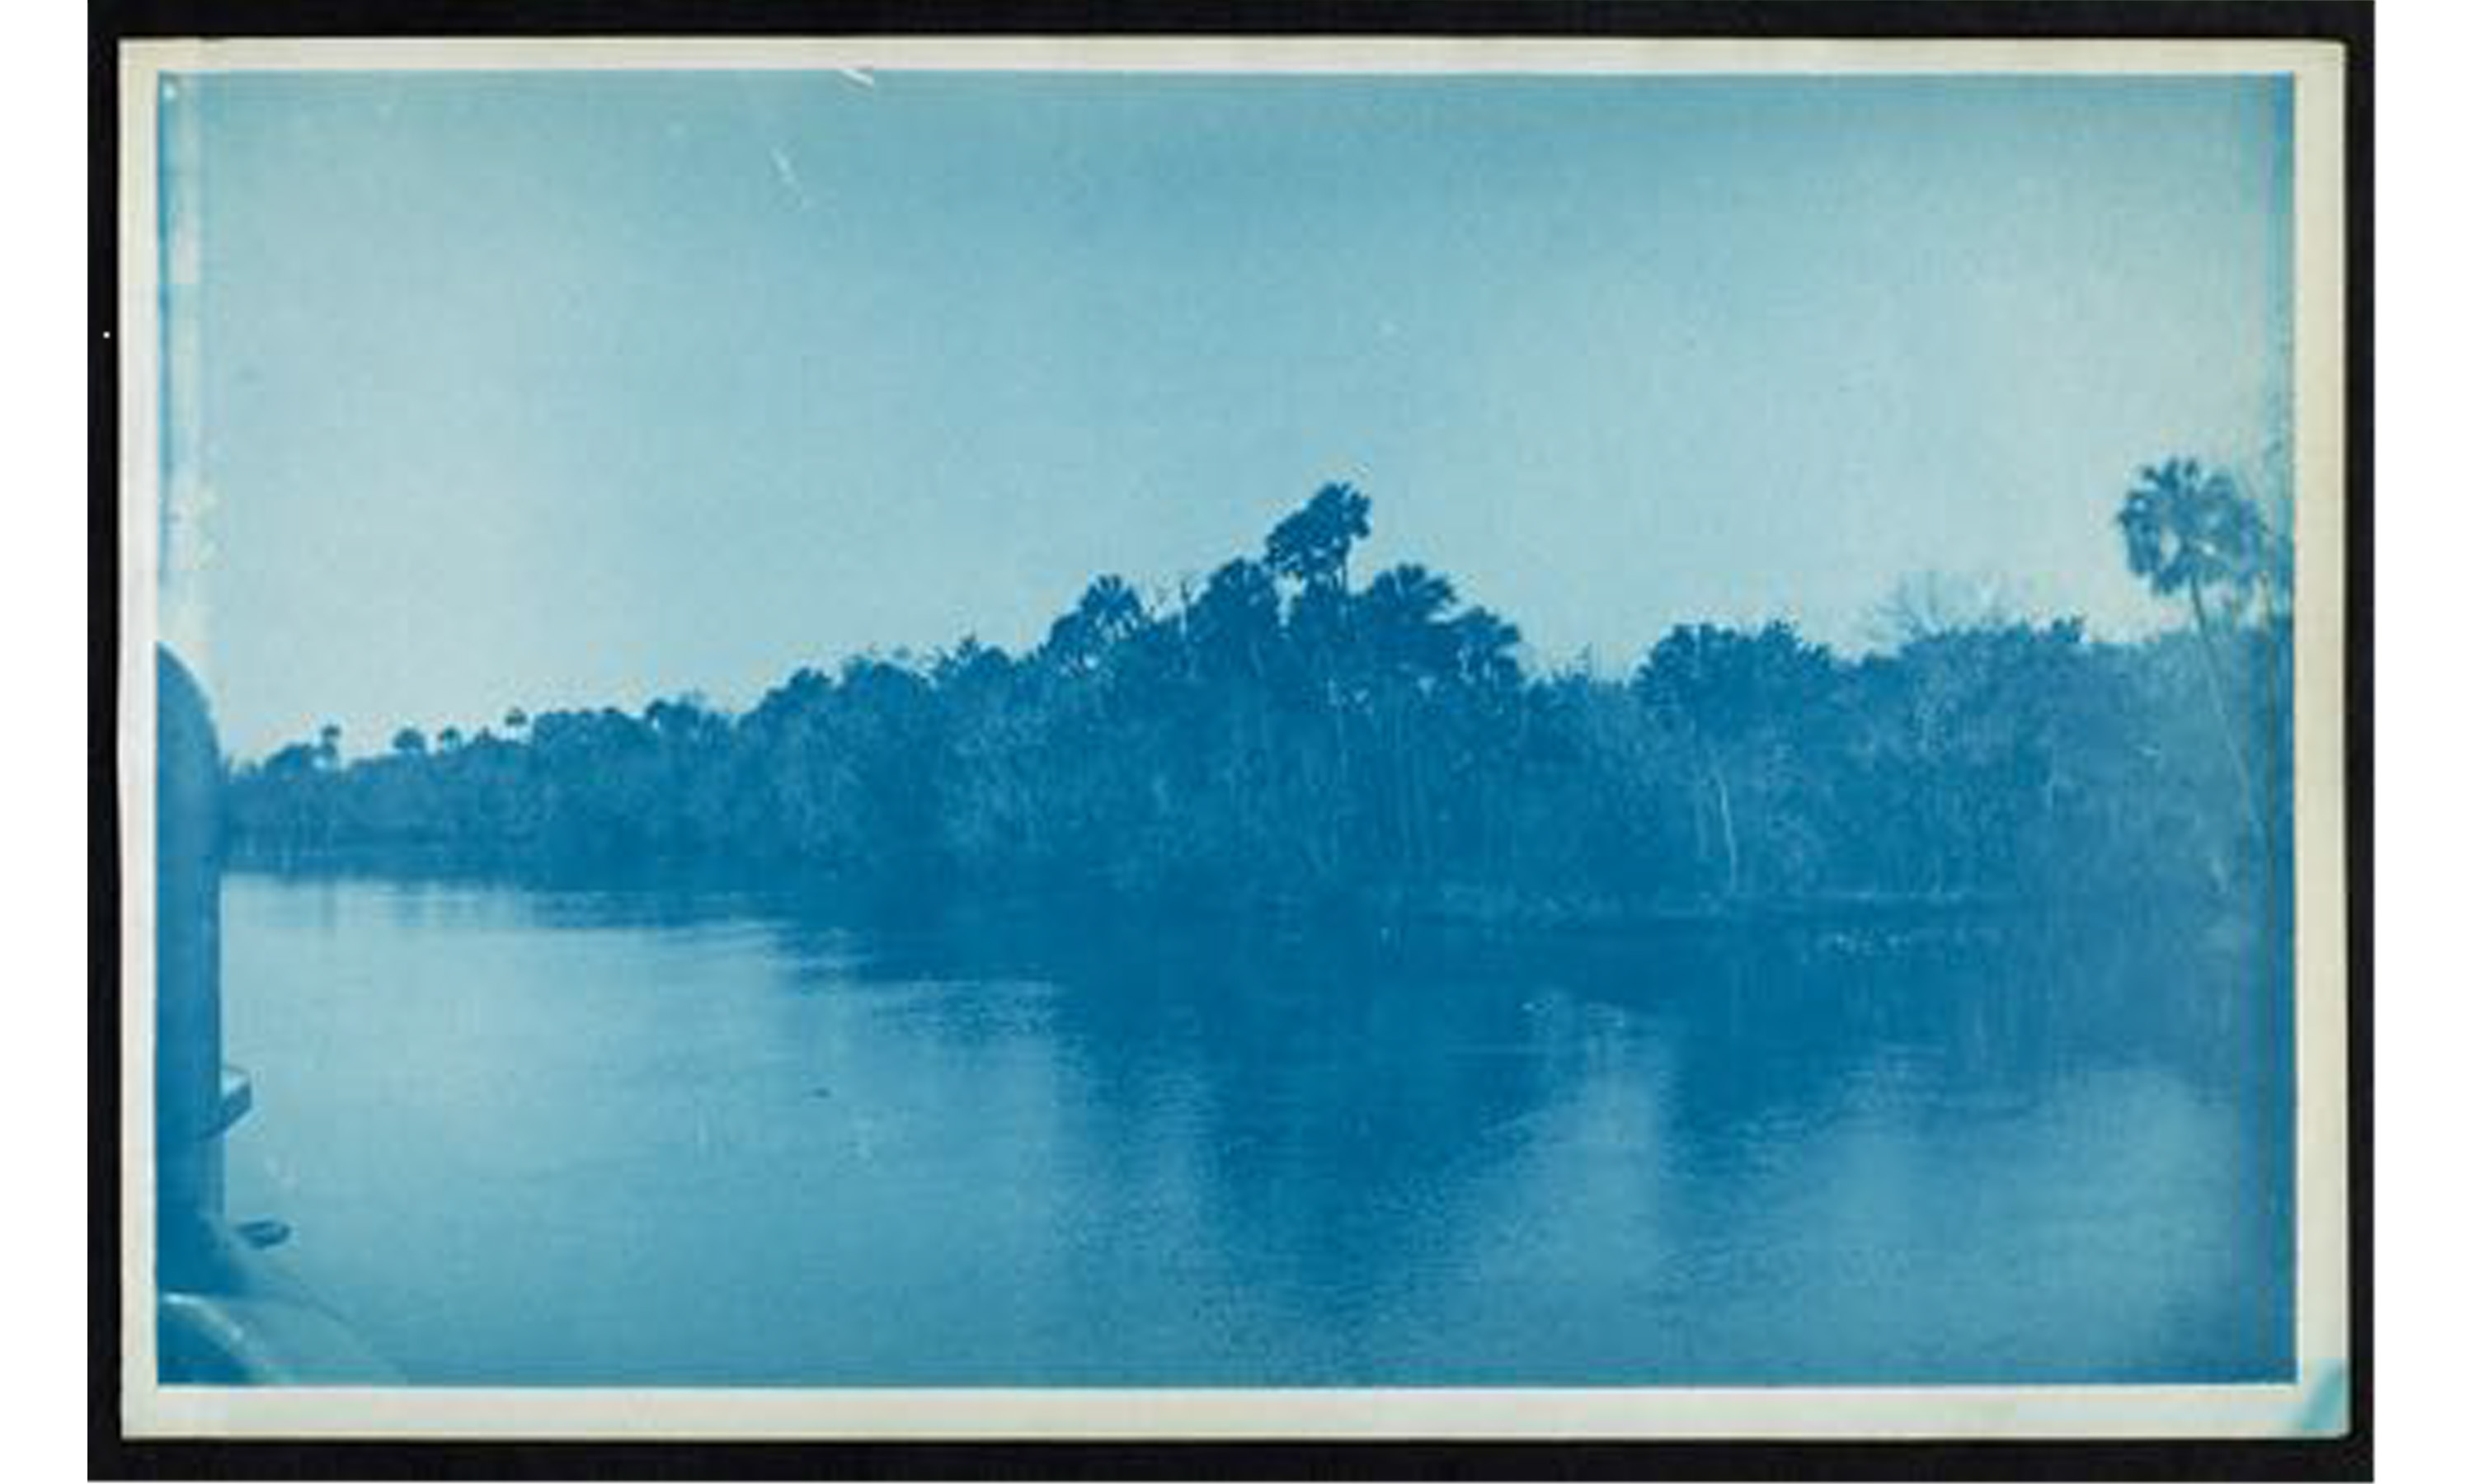
While the cyanotype process was largely used to produce blueprints, some photographers, particularly amateurs, made use of it because of its economy and ease of use.
![]()
For these types of images, photographers used a similar process to that described above, except with a photographic negative in place of a flower or architectural drawing. The example above is by Unknown Artist, 19th Century On Upper St. John River SC 2017.22.47.
Because the cyanotype process is fairly simple and safe, it’s a perfect process to try while you’re home, although it does require a little bit of planning ahead. The two chemical solutions required are available in powdered form from most art stores or online, and the mixing process is very easy; just follow the directions on the kit. It’s important to mix only as much solution as you’ll use in that moment, as the mixed solution has a short shelf life. Other than the solution, you’ll need some paper and a foam brush. Certain types of paper work better than others for making cyanotypes. Some paper has compounds in it which turn brown when combined with the chemicals in the cyanotype process, leaving your prints with brown spots, while other papers do not readily absorb the cyanotype solution. I’ve had success using Stonehenge paper, which is available in large sheets at most art stores, and also with Canson recycled bristol which is available in pad form and easily found online.
Once you’ve mixed it, the cyanotype solution is sensitive to UV light. An easy way to control for this is to coat your paper at night in a room with a door you can close. This is a pretty forgiving process; you don’t need a photography darkroom. Light from your regular lightbulbs won’t really affect your paper, though I still try to minimize exposure. Use a foam brush to coat your paper. I usually cover a table with butcher paper, newspaper, or plastic and paint on a single layer of the solution. The unexposed solution is a pale yellow-green color. It will stain your fingers for a few days and clothes for longer than that, so I recommend wearing gloves and an apron. When you’ve finished coating your paper, turn off the lights and close the door and let the paper sit and dry. When dry, store the paper somewhere dark, like in a drawer or inside a black garbage bag. An additional way to avoid light bleeds is to keep your dry paper with the painted side down until you plan to use it, wherever you store it. Your paper will be most effective starting about 12 hours after you coat it.
Now it’s time to make some images! Once you’ve finished preparing your paper, you’ll need some sun, a piece of glass or plexiglass (if you don’t have one around, you can raid a picture frame or small sheets of plexiglass are available at most hardware stores), and whatever object you choose to make an image with. The basic procedure here is to place your paper in the sun, your object on top, and your glass or plexi on top of that to hold it tight against the paper and keep it from moving. Once your exposure is done, you rinse the print with water. As you rinse, the color of the print will change to a brighter blue, and unexposed areas will turn white. After rinsing the print, hang it up to dry and the image will darken as it dries. I usually speed up the process of darkening the image by spraying it with a solution of water (95%) and hydrogen peroxide (5%) and then rinsing it in water again after. If you don’t fully rinse your prints they can end up with stains on them from unwashed solution. There are different methods for doing this. Some people use trays full of water and let the prints soak. I just wash mine under the tap for a few minutes, making sure to rinse the front and the back thoroughly. It’s possible to over rinse, but unlikely unless you leave it soaking for a very long time.
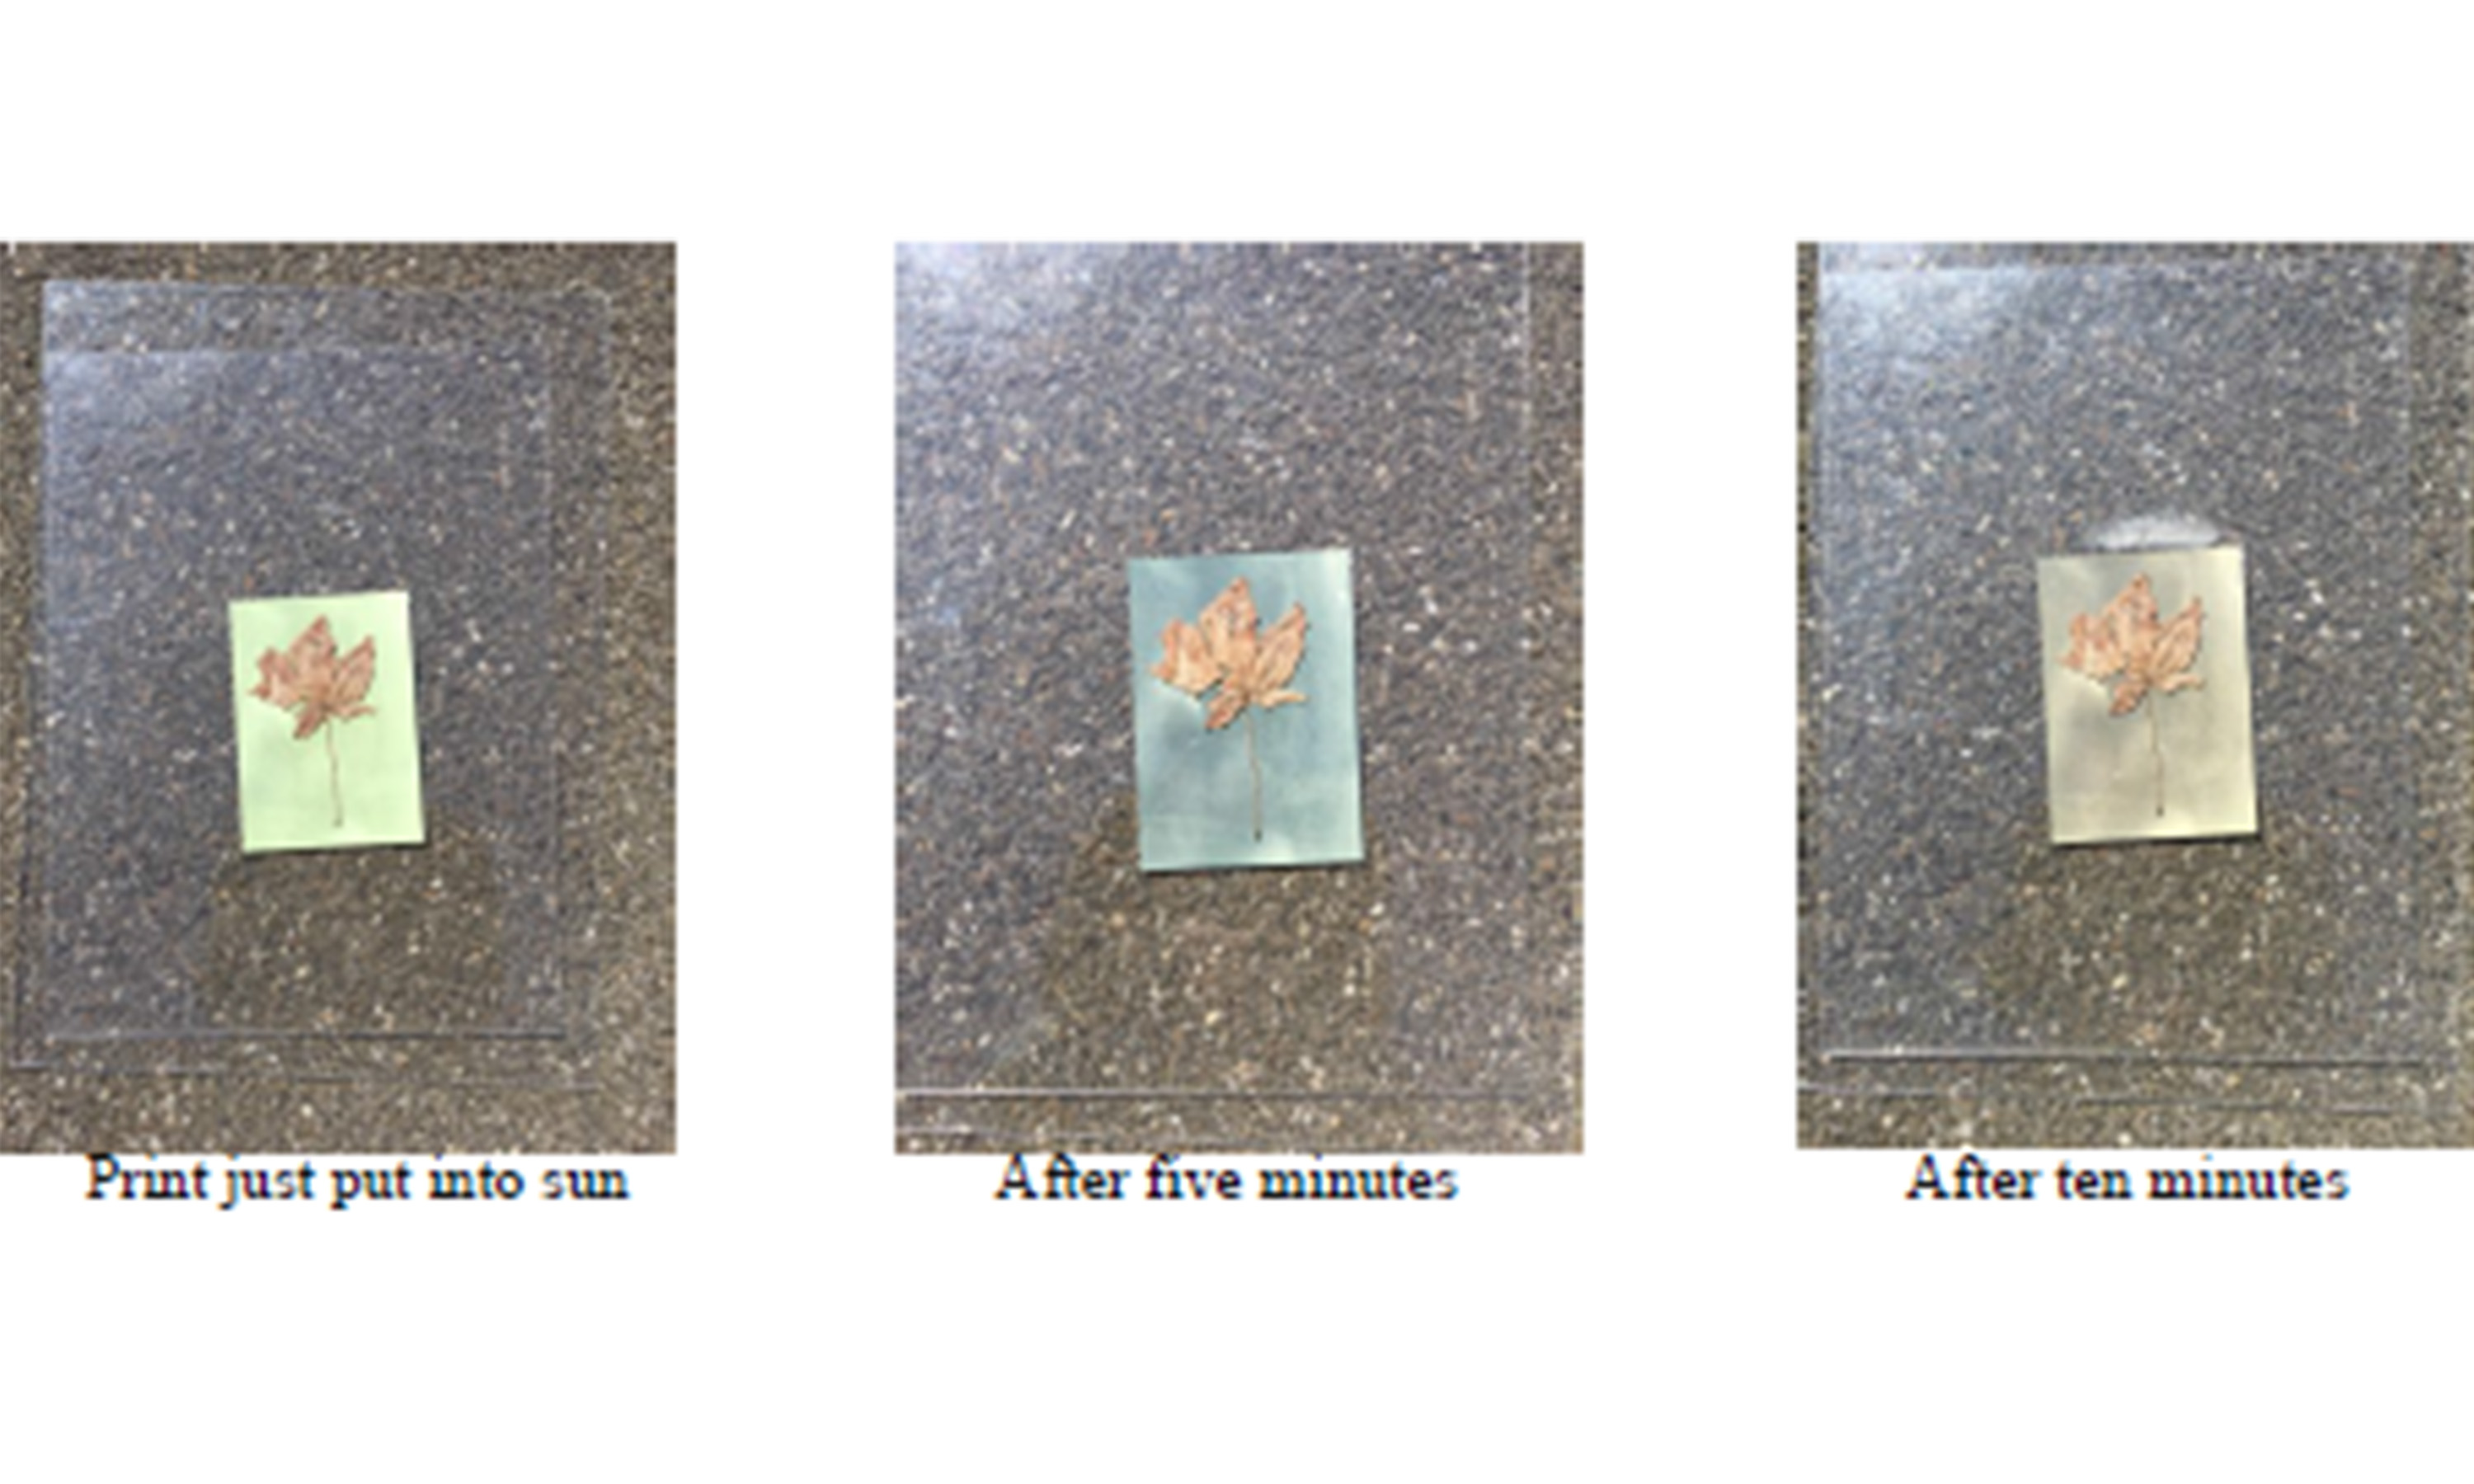
There is some trial and error involved in figuring out exposure times, or how long you leave your print in the sun, but there are also some clues the process gives you. As the paper is exposed, the pale green color of the painted surface begins to turn darker: almost blue but not quite. A very exposed print almost has a grey tone.
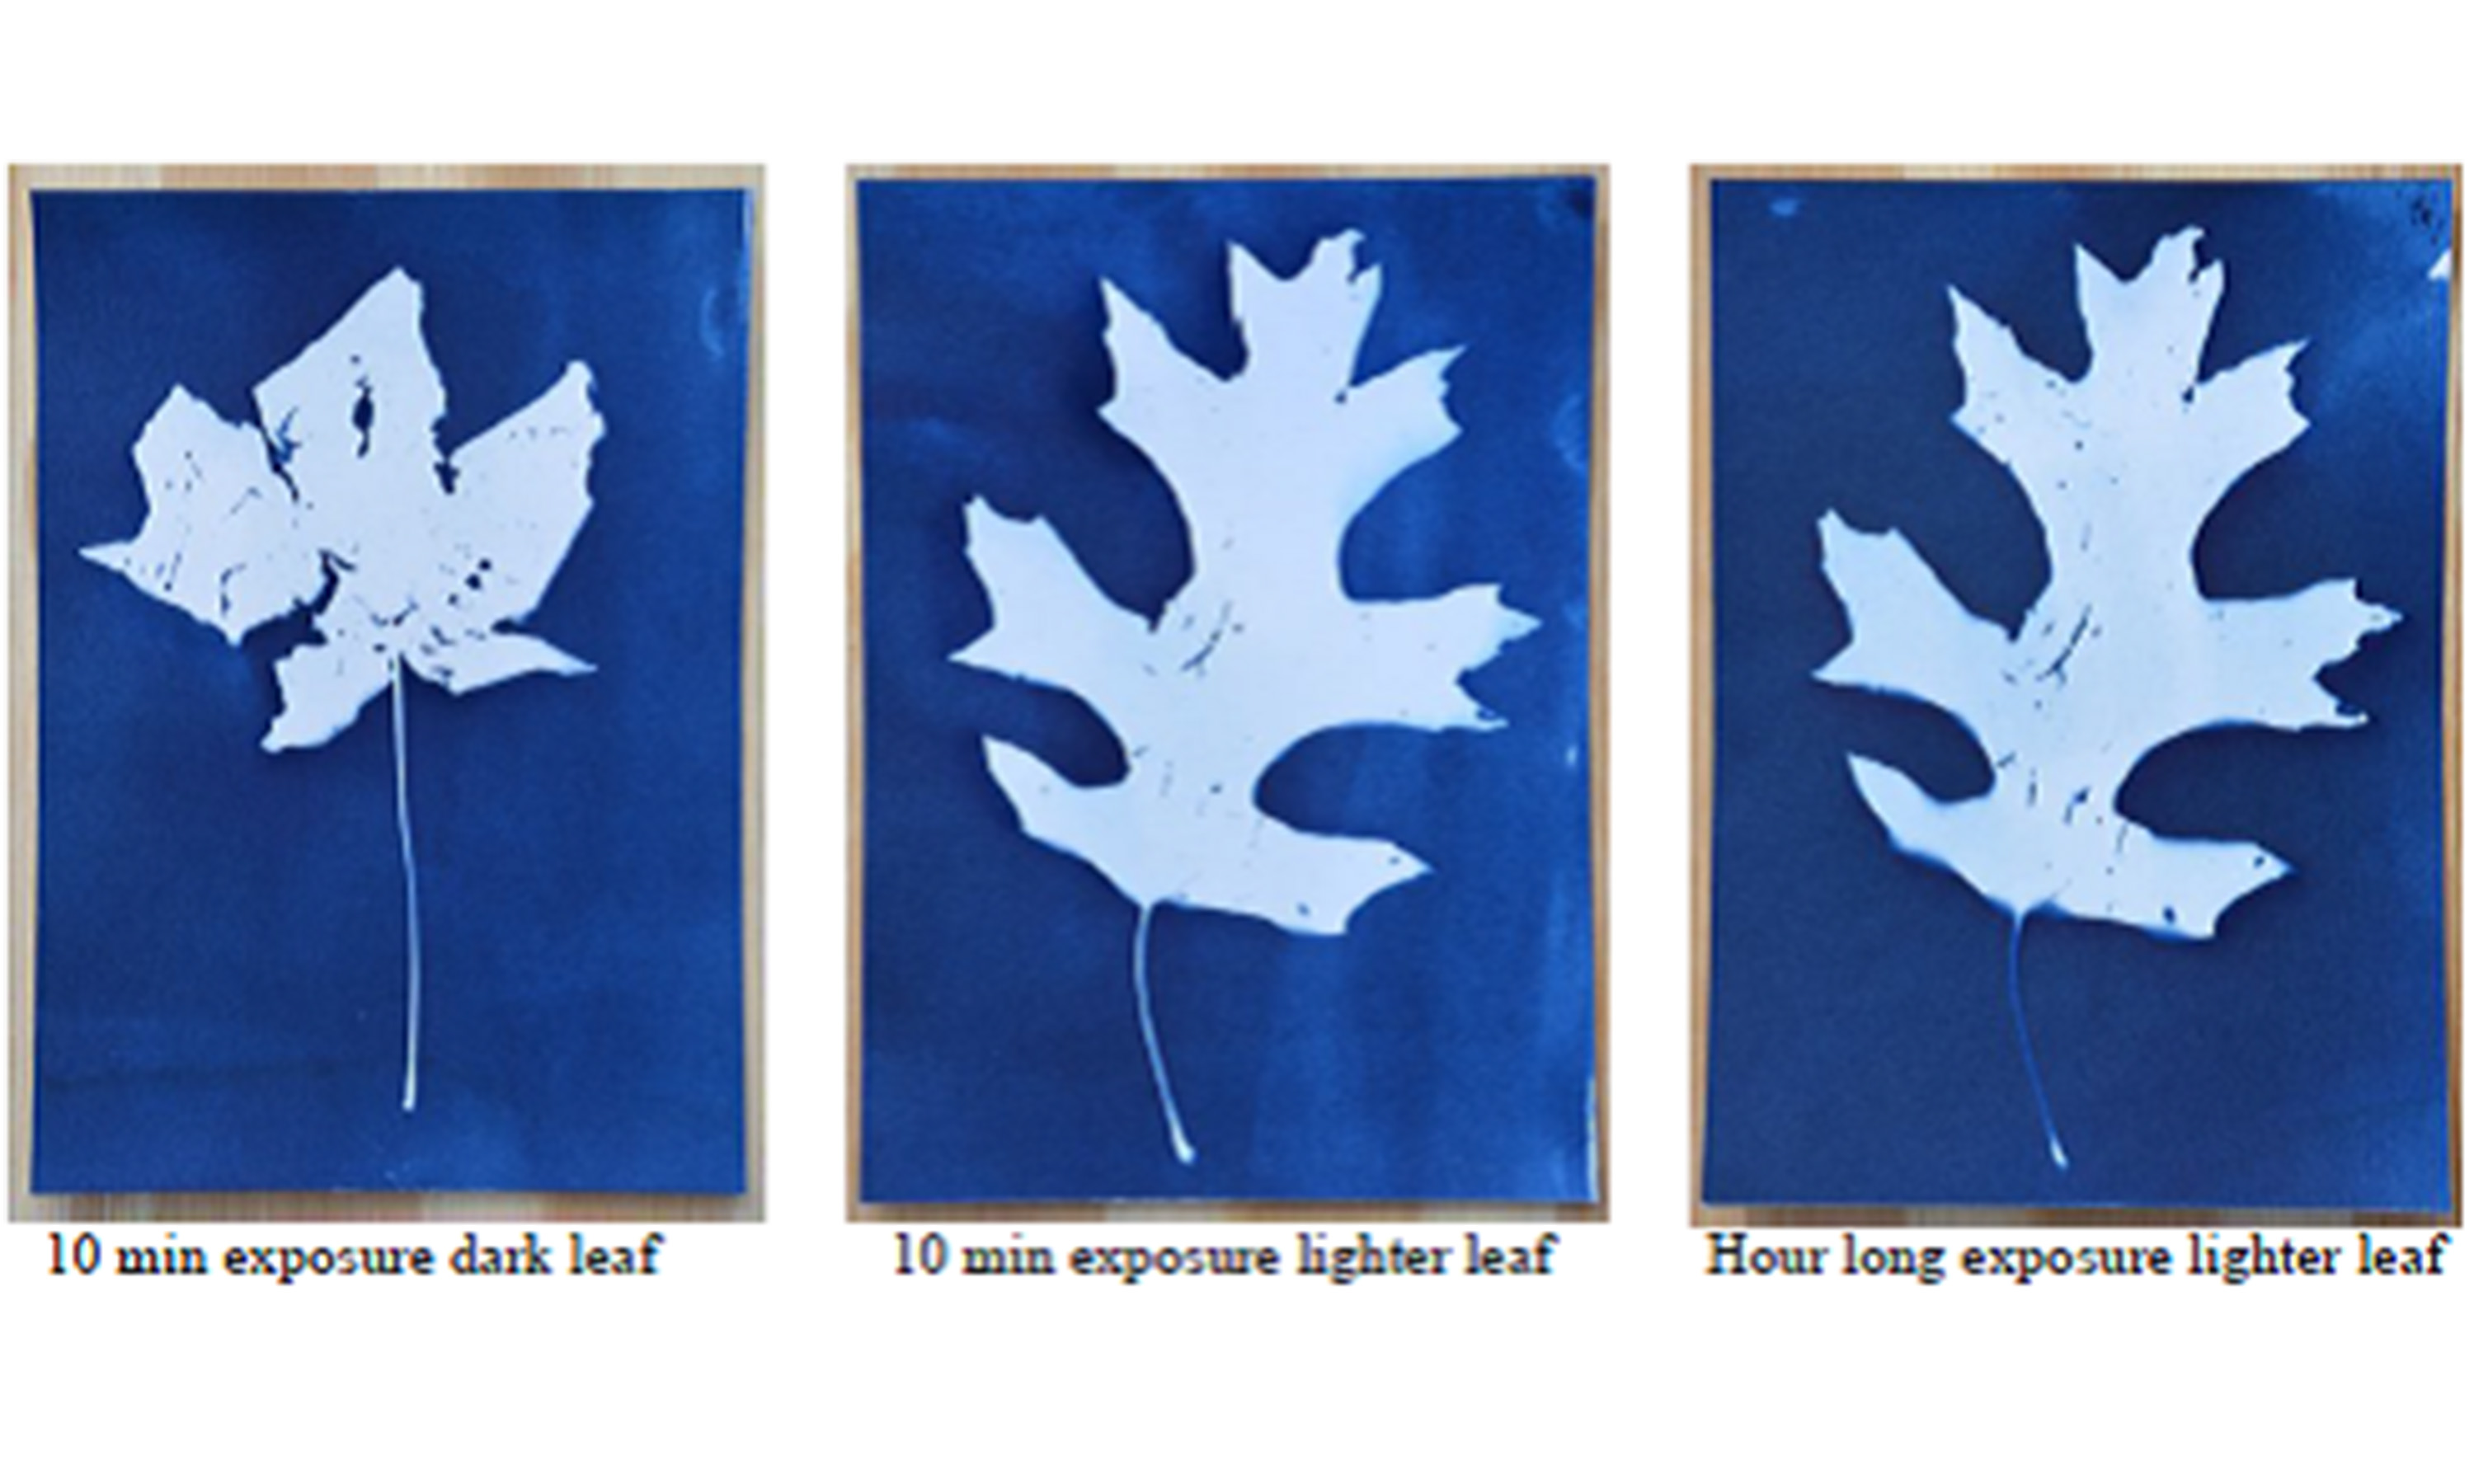
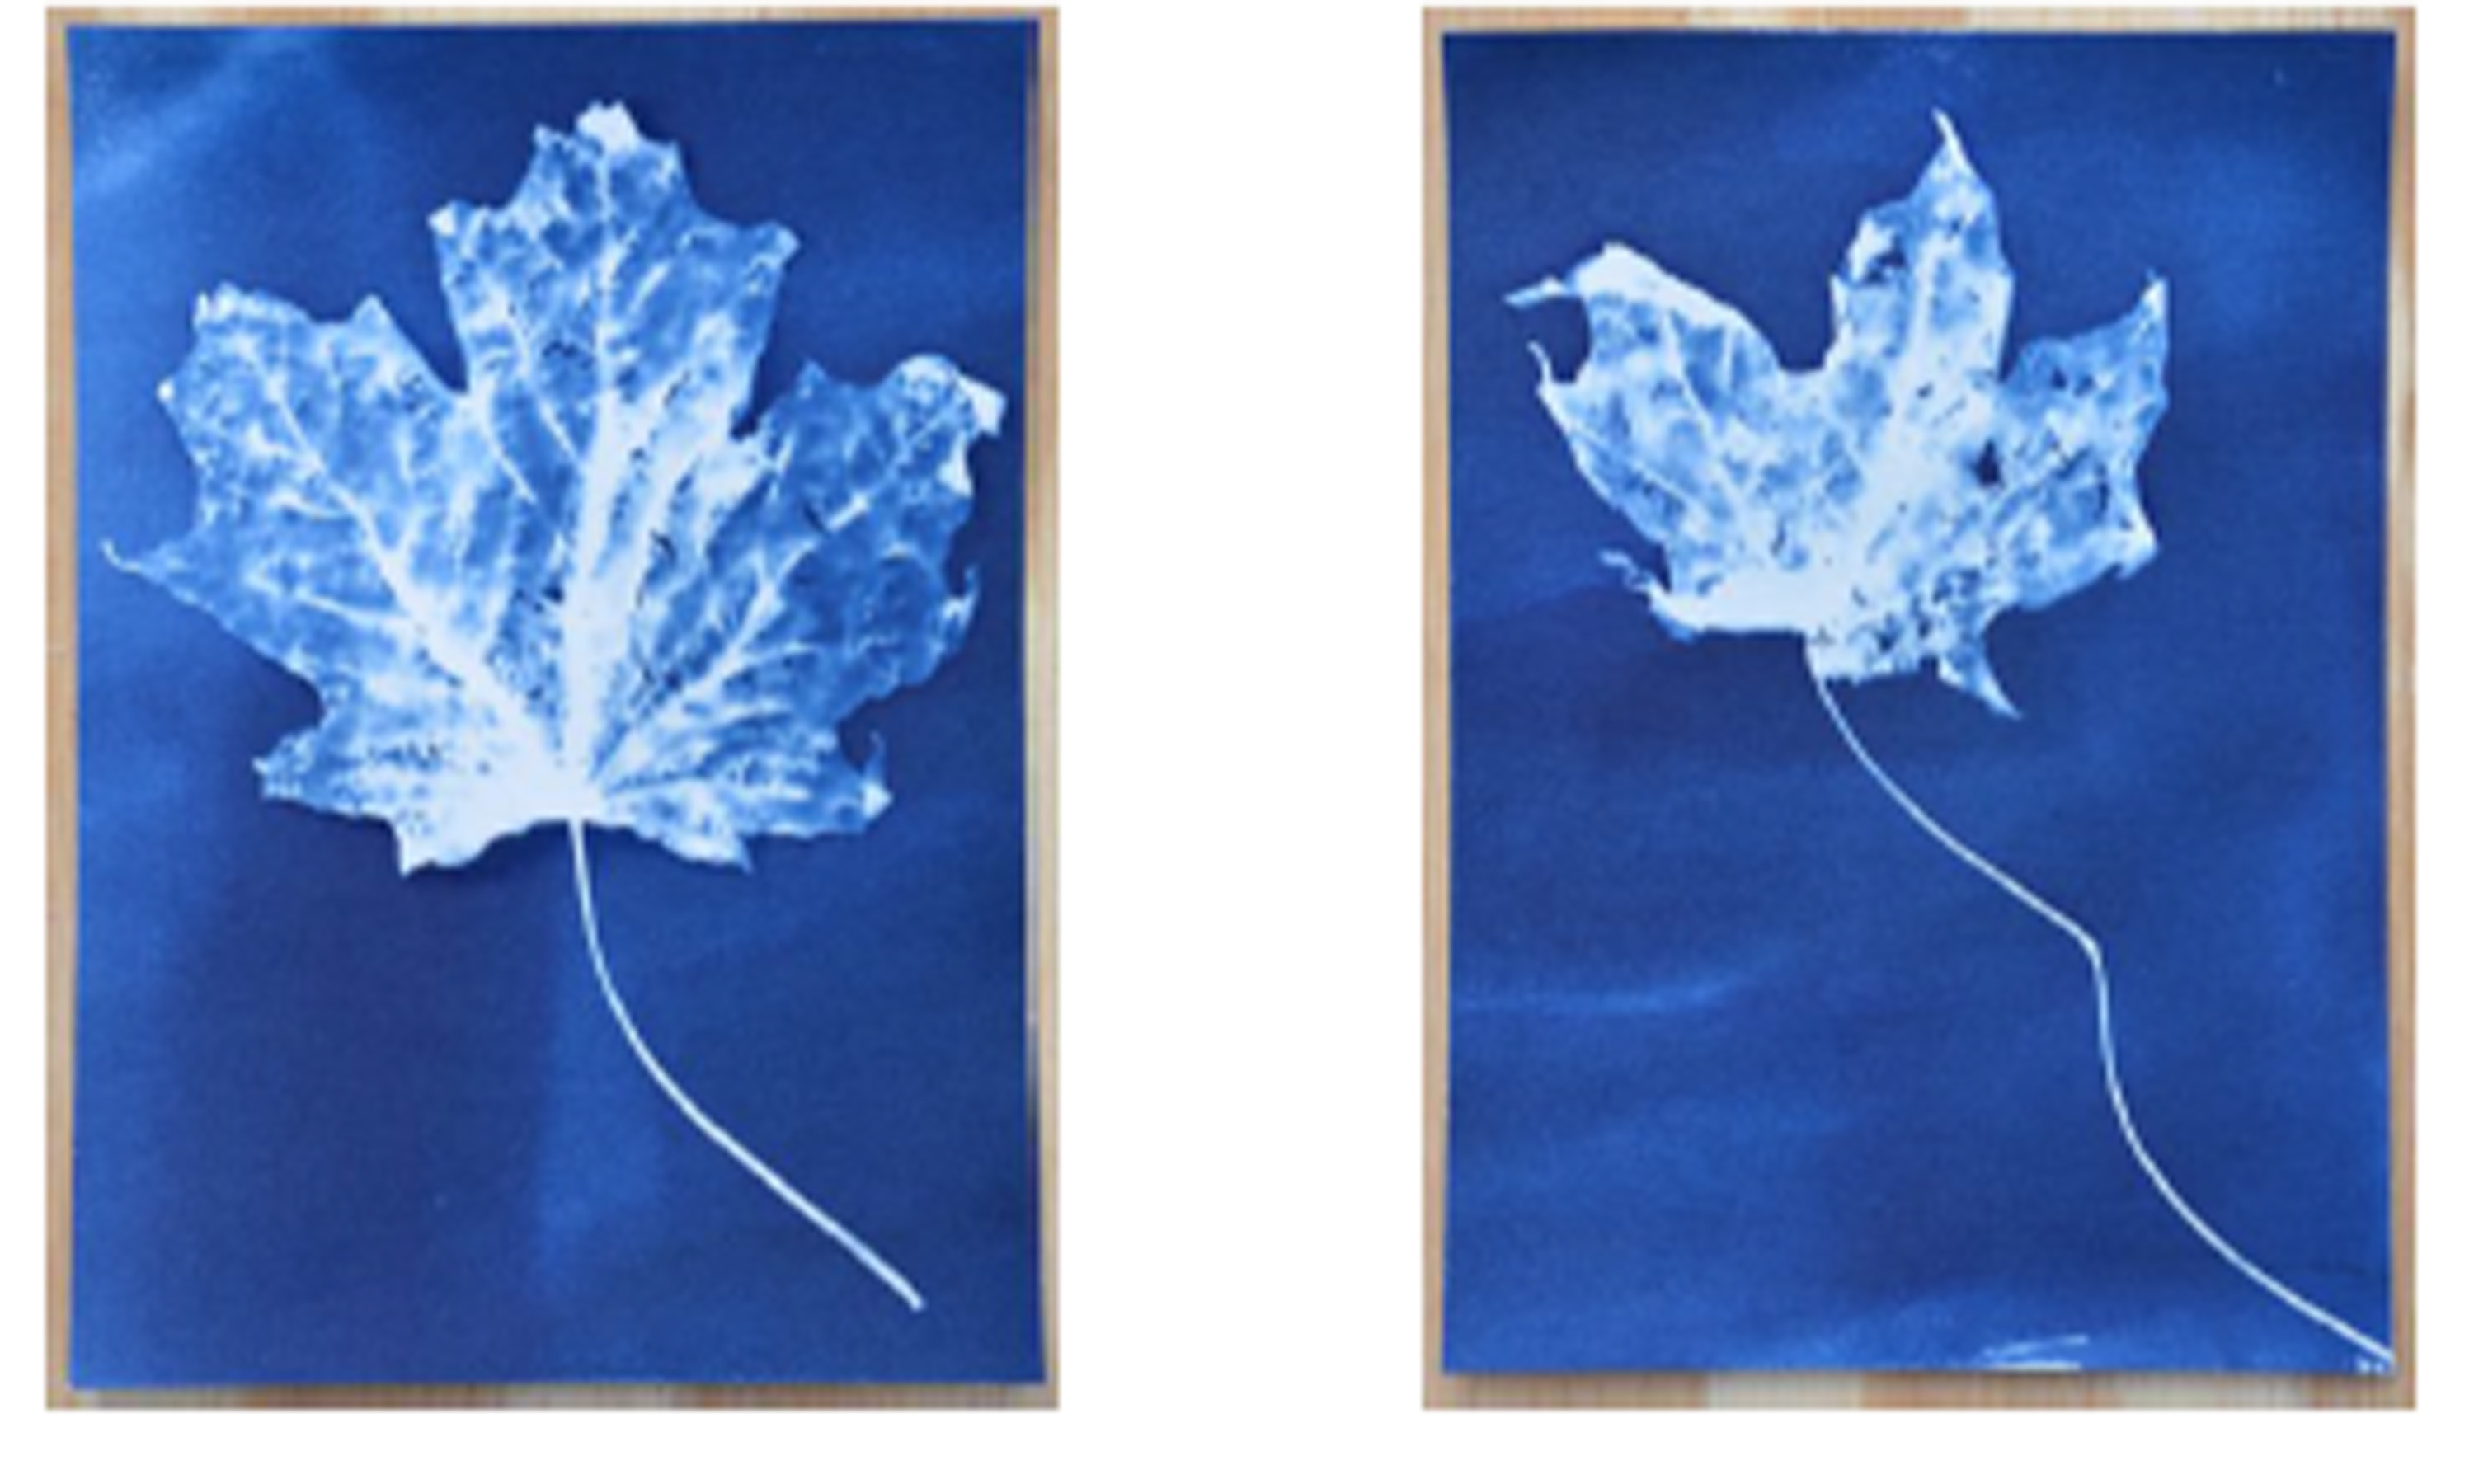
Exposure times vary considerably depending on the time of day, location, cloudiness, etc. The best way to figure out how long to expose your images on any given day is to do a few small tests: cut four small squares from one of your pieces of paper and put them out in the sun and leave the first for three minutes, the second for five, the third for seven, and the last for ten. Rinse them and the depth of the color blue should give you some idea of how long you need to expose your prints to get the color you’d like. On a very sunny day your print might expose in just one minute, but if it is a particularly cloudy day in the winter when the sun isn’t as strong, you might have to expose your print for more than half an hour to get any tone at all. There are a few things to consider when choosing the object to create your print with. Opaque objects will give you an image with a smaller range of tones – it’ll essentially be blue and white. More transparent objects will give you a wider tonal range. Thicker objects or objects that won’t lie flat will give you a blurry edges where light is able to get beneath them. In the cyanotype below, I started with a dark brown dried leaf and exposed it for 10 minutes in bright sun. As you can see the silhouette of the leaf is crisp, but there is no detail inside it. I switched to a slightly lighter brown leaf and tried again with similar results. Then out of curiosity, I exposed that same leaf for an hour to see if even a fairly opaque object would eventually yield some more detail in bright sun. As you can see, it did not!
However, using more transparent dried leaves gave me lots of interior detail.
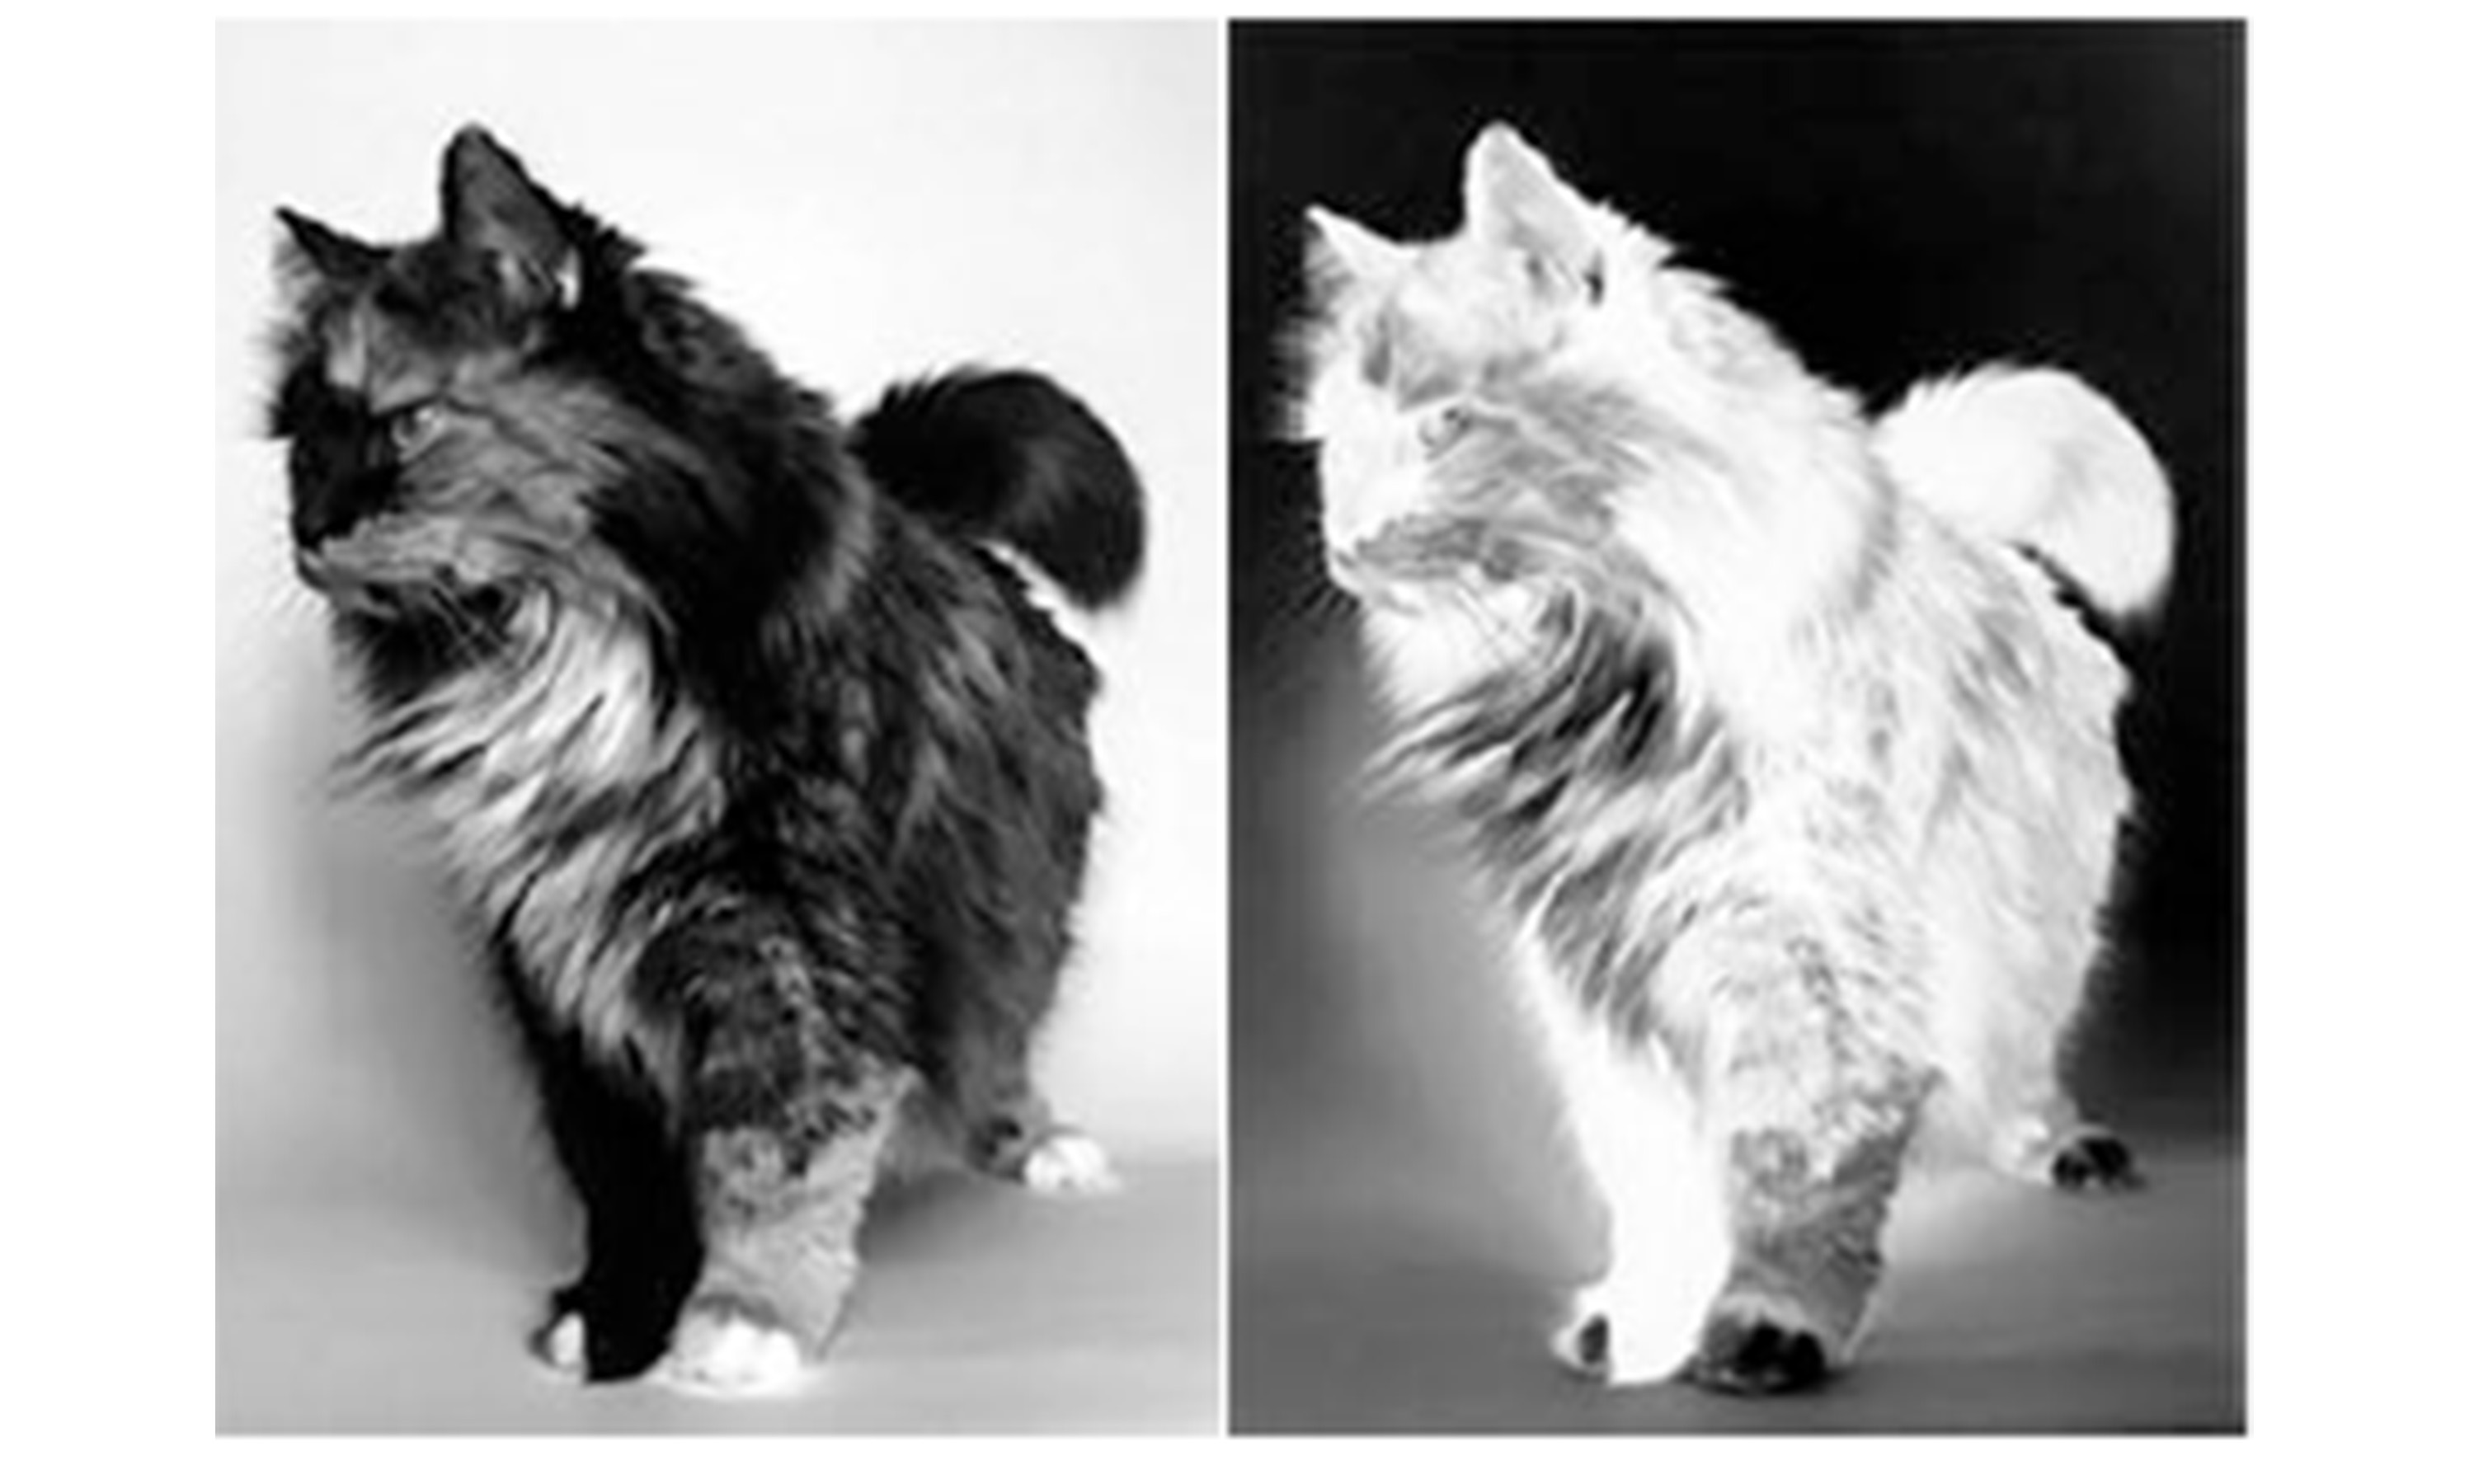
If you want to make cyanotypes from photographs, here is one method. This is my cat, Pickle.

![]()
![]()
To make a cyanotype from this photograph, I switched the image to grayscale, and then inverted it to make a negative using Photoshop. There are free image editors available online that will let you do this too.
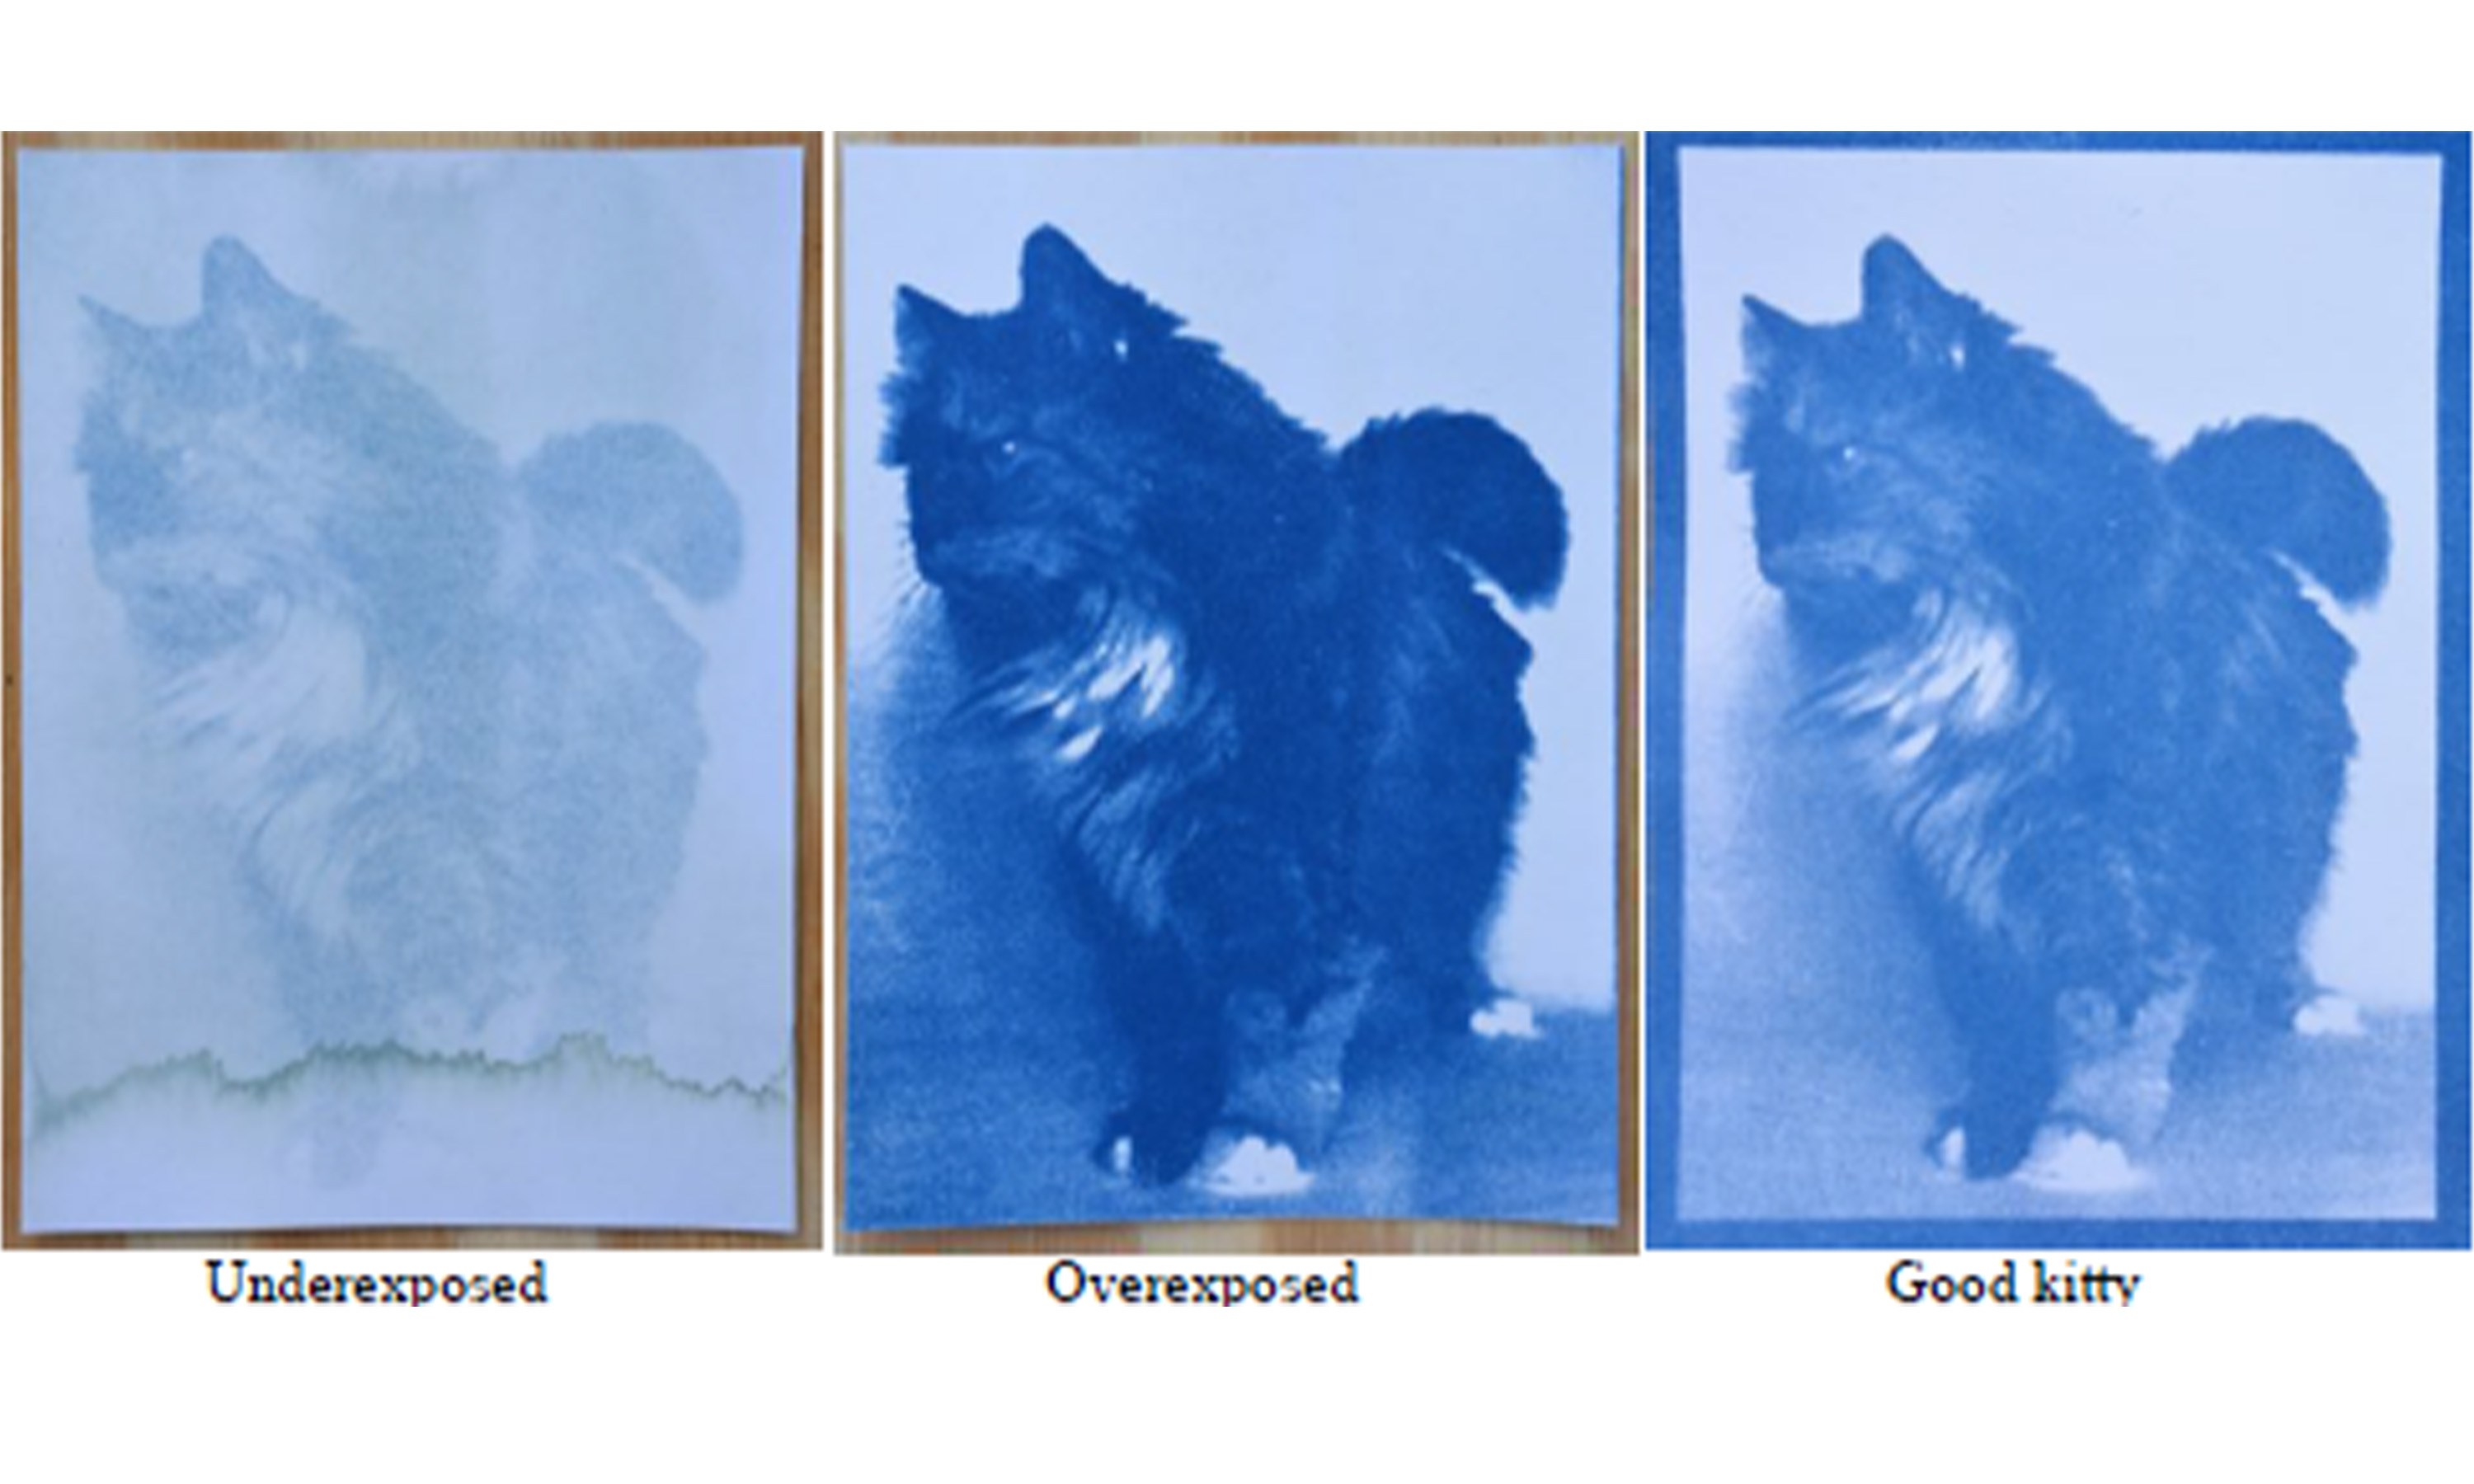
I then printed the negative on a piece of tracing paper. Plastic transparencies work better, giving you more contrast and a finer print surface, but tracing paper was all I had on hand and it works pretty well. After that I had to do a few trials to dial in how much light would penetrate the black ink. A one minute exposure was too short (and as you can see from the line of green, I didn’t spend enough time rinsing it) while a three and a half minute exposure lost a lot of the detail in the middle tones. A two and a half minute exposure yielded the closest comparison to the original photograph.
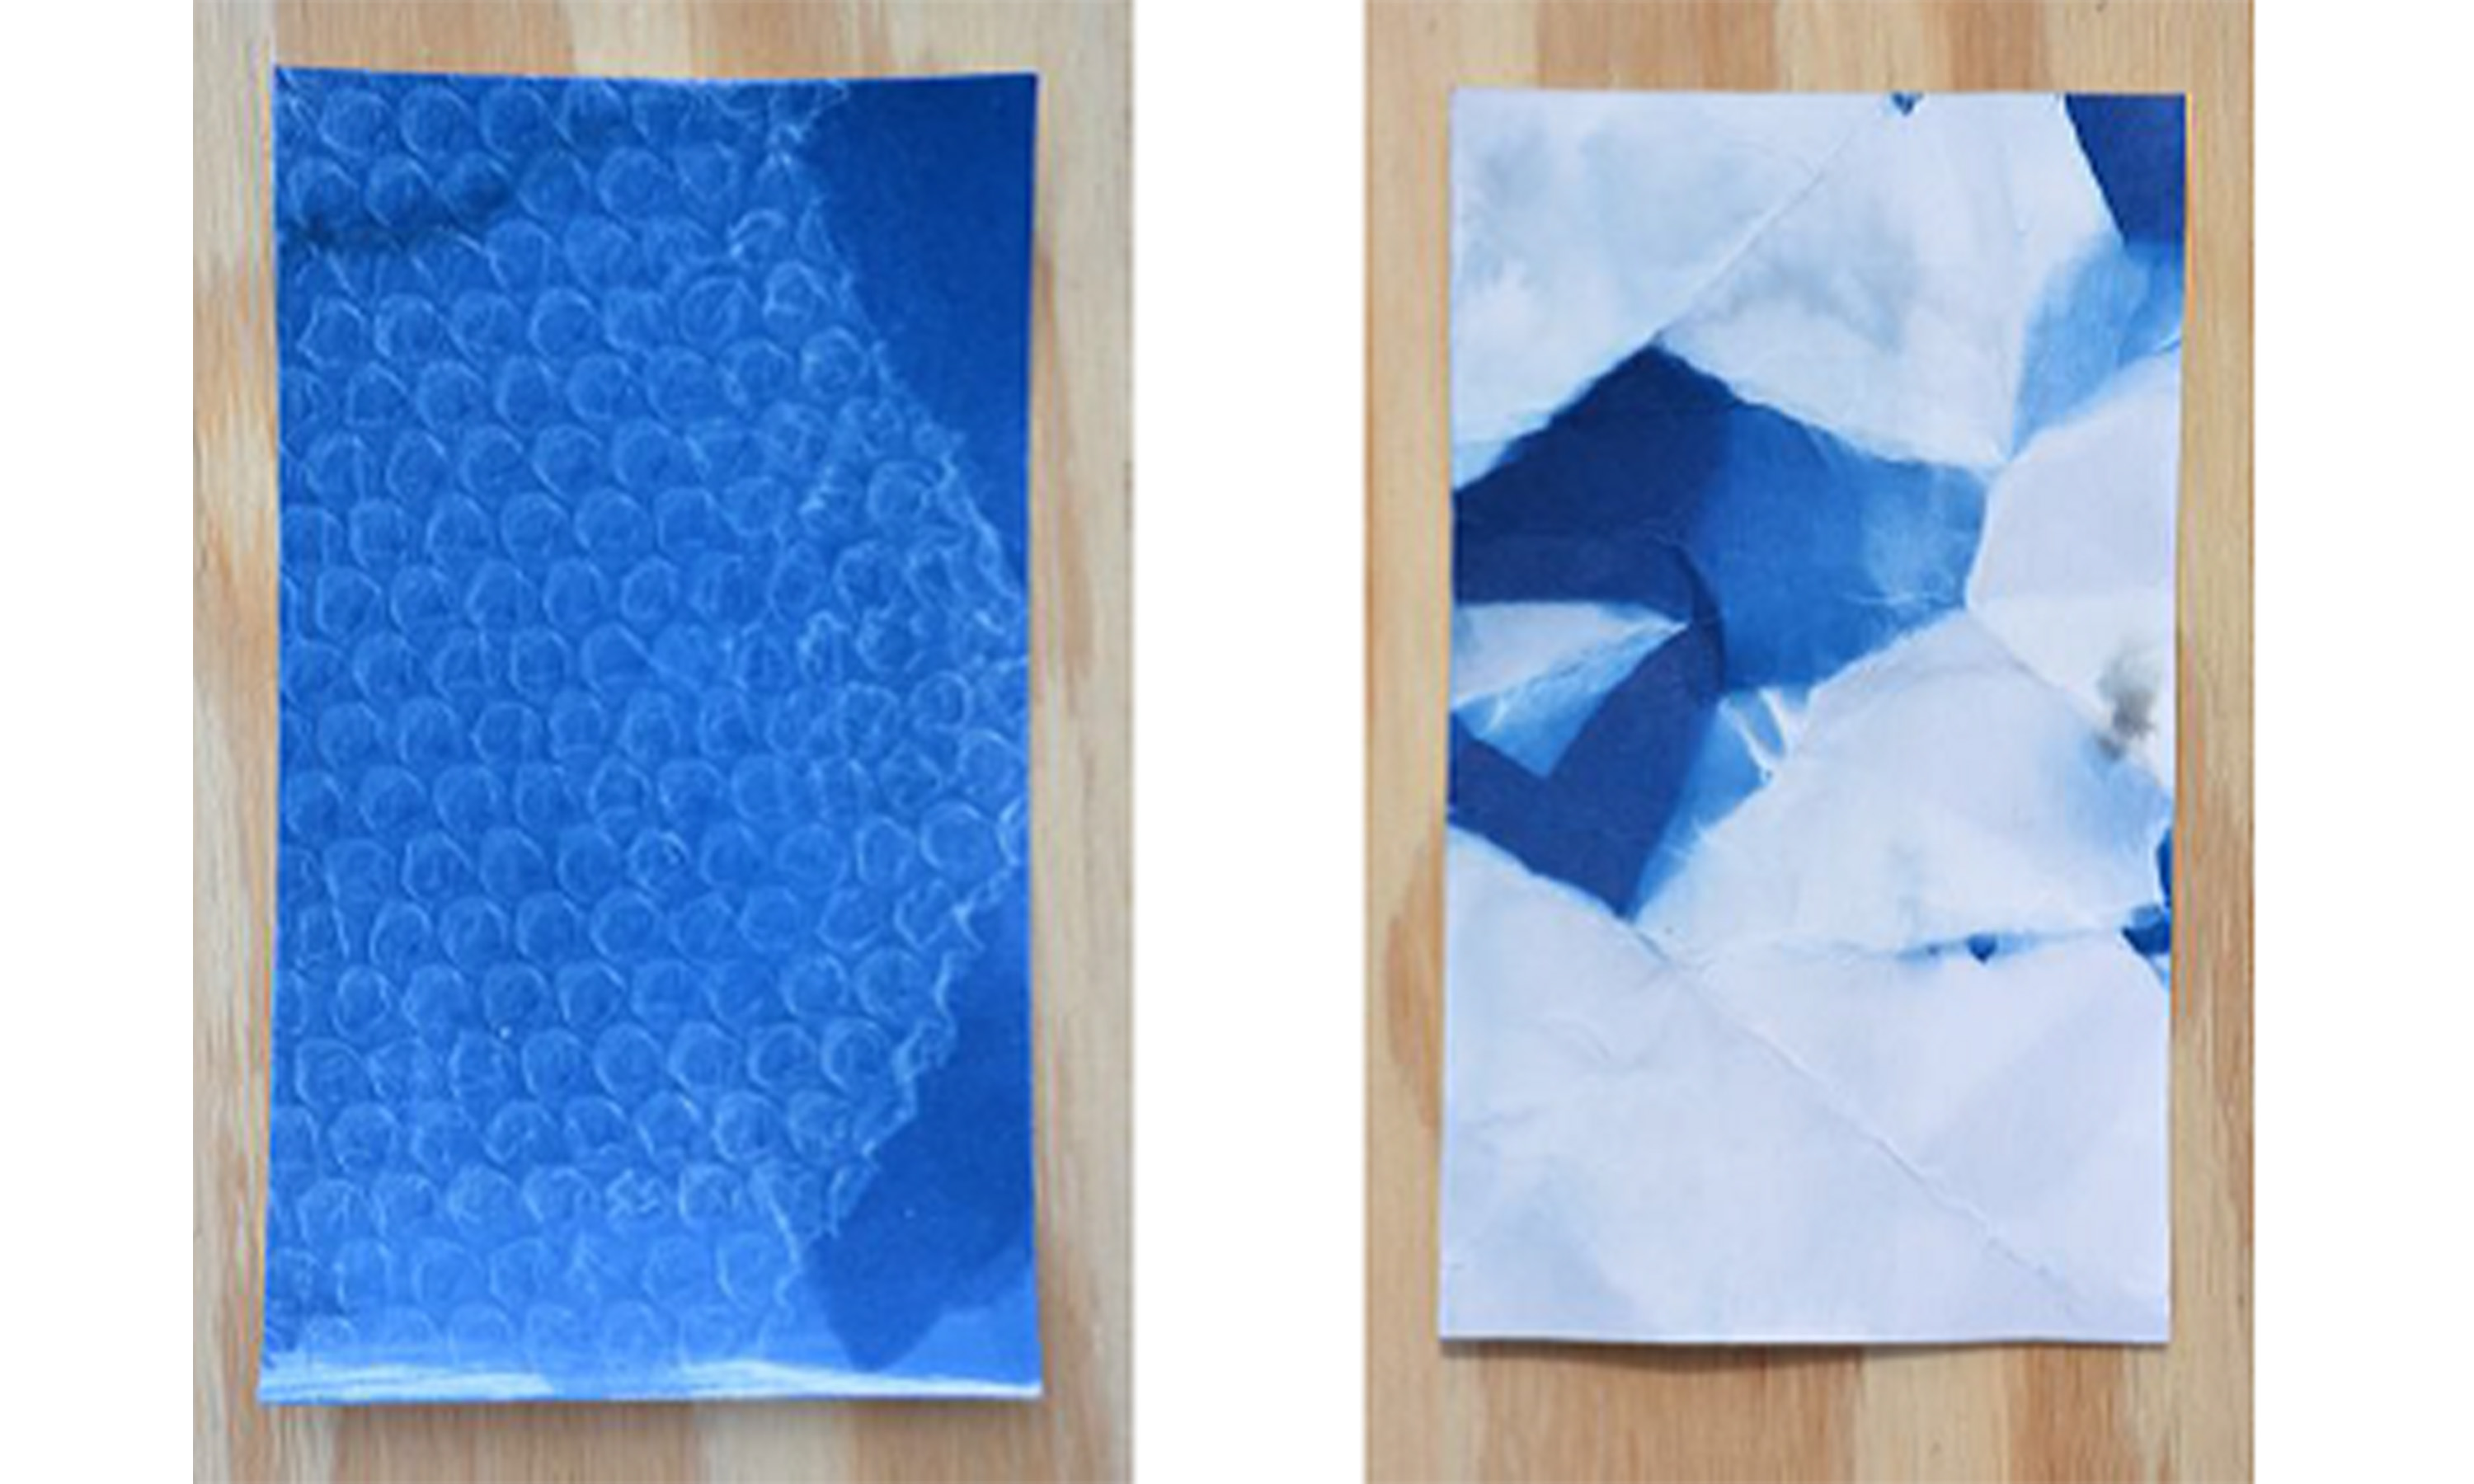
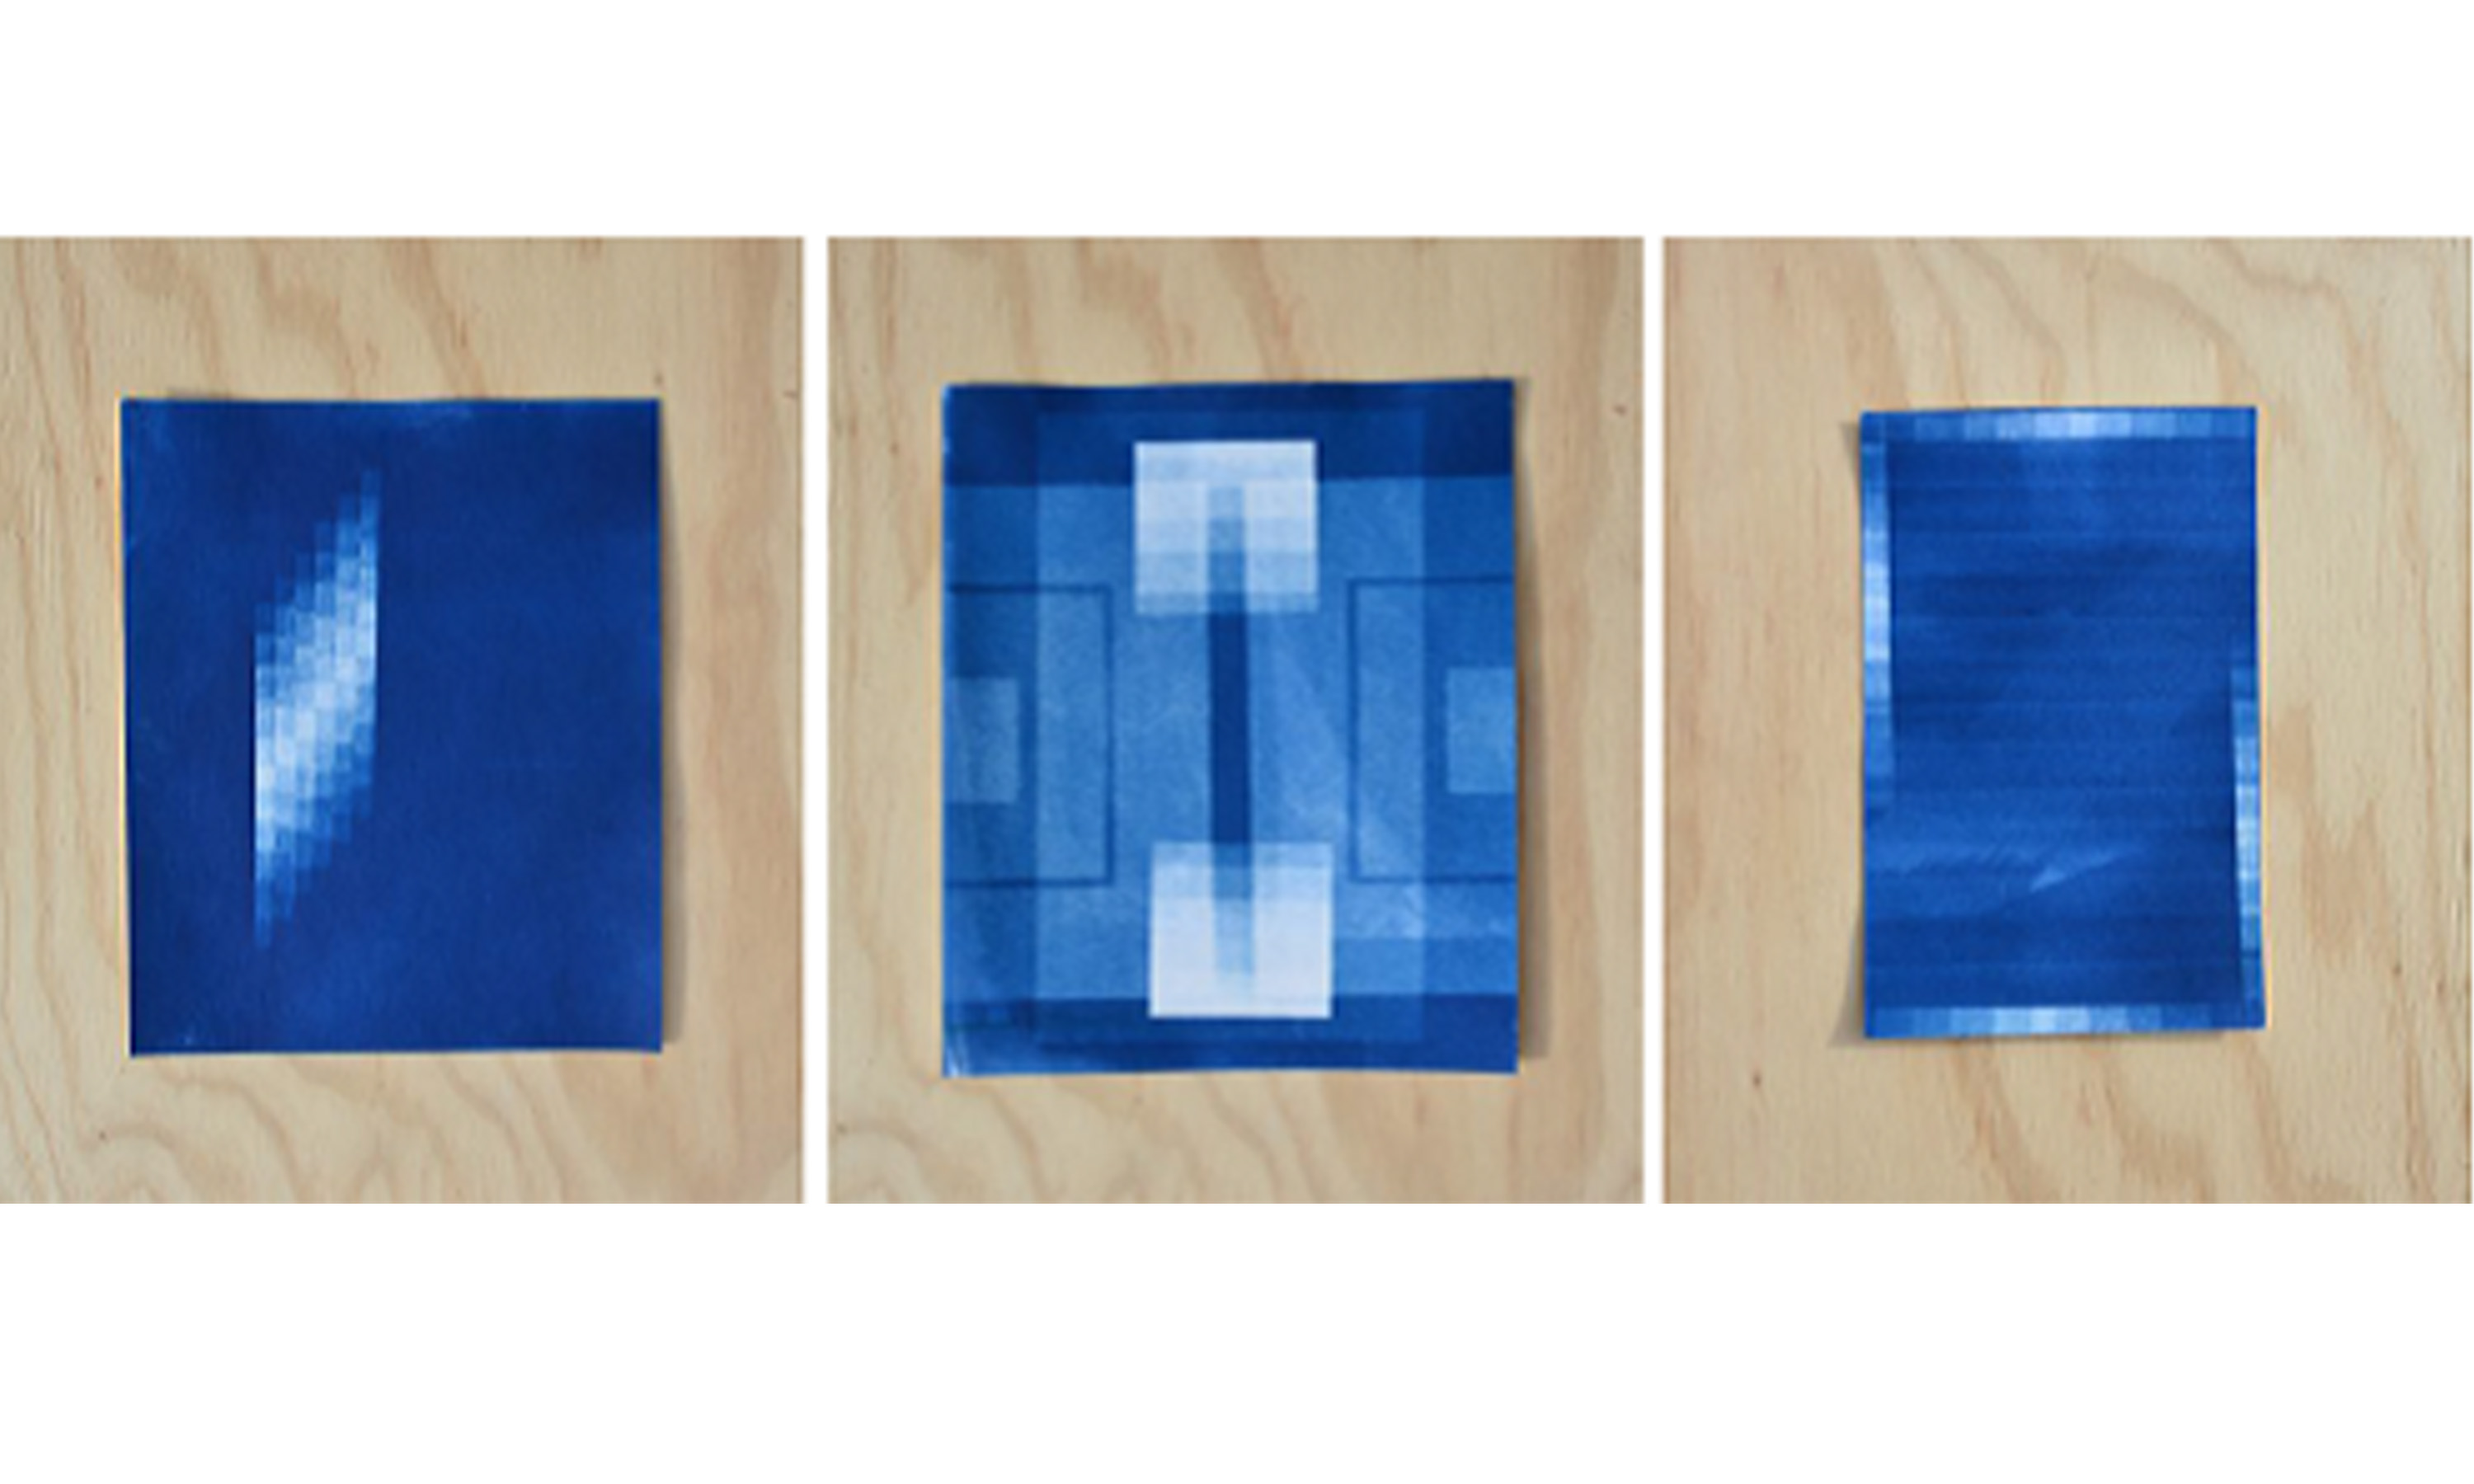
The best way to figure out how you want to use this process is to just try things. I start out by coating large pieces of paper and cutting some of them down into smaller sizes, usually around 4x6 or 5x7. I experiment from there. On the left is a print I exposed for one minute with a piece of bubble wrap on it, and on the right a piece of paper coated in the solution that I crumpled up and threw outside for five minutes.
These are prints I made using cut and layered pieces of tracing paper. By layering the nearly transparent paper I was able to create different levels of opacity to get different tones.
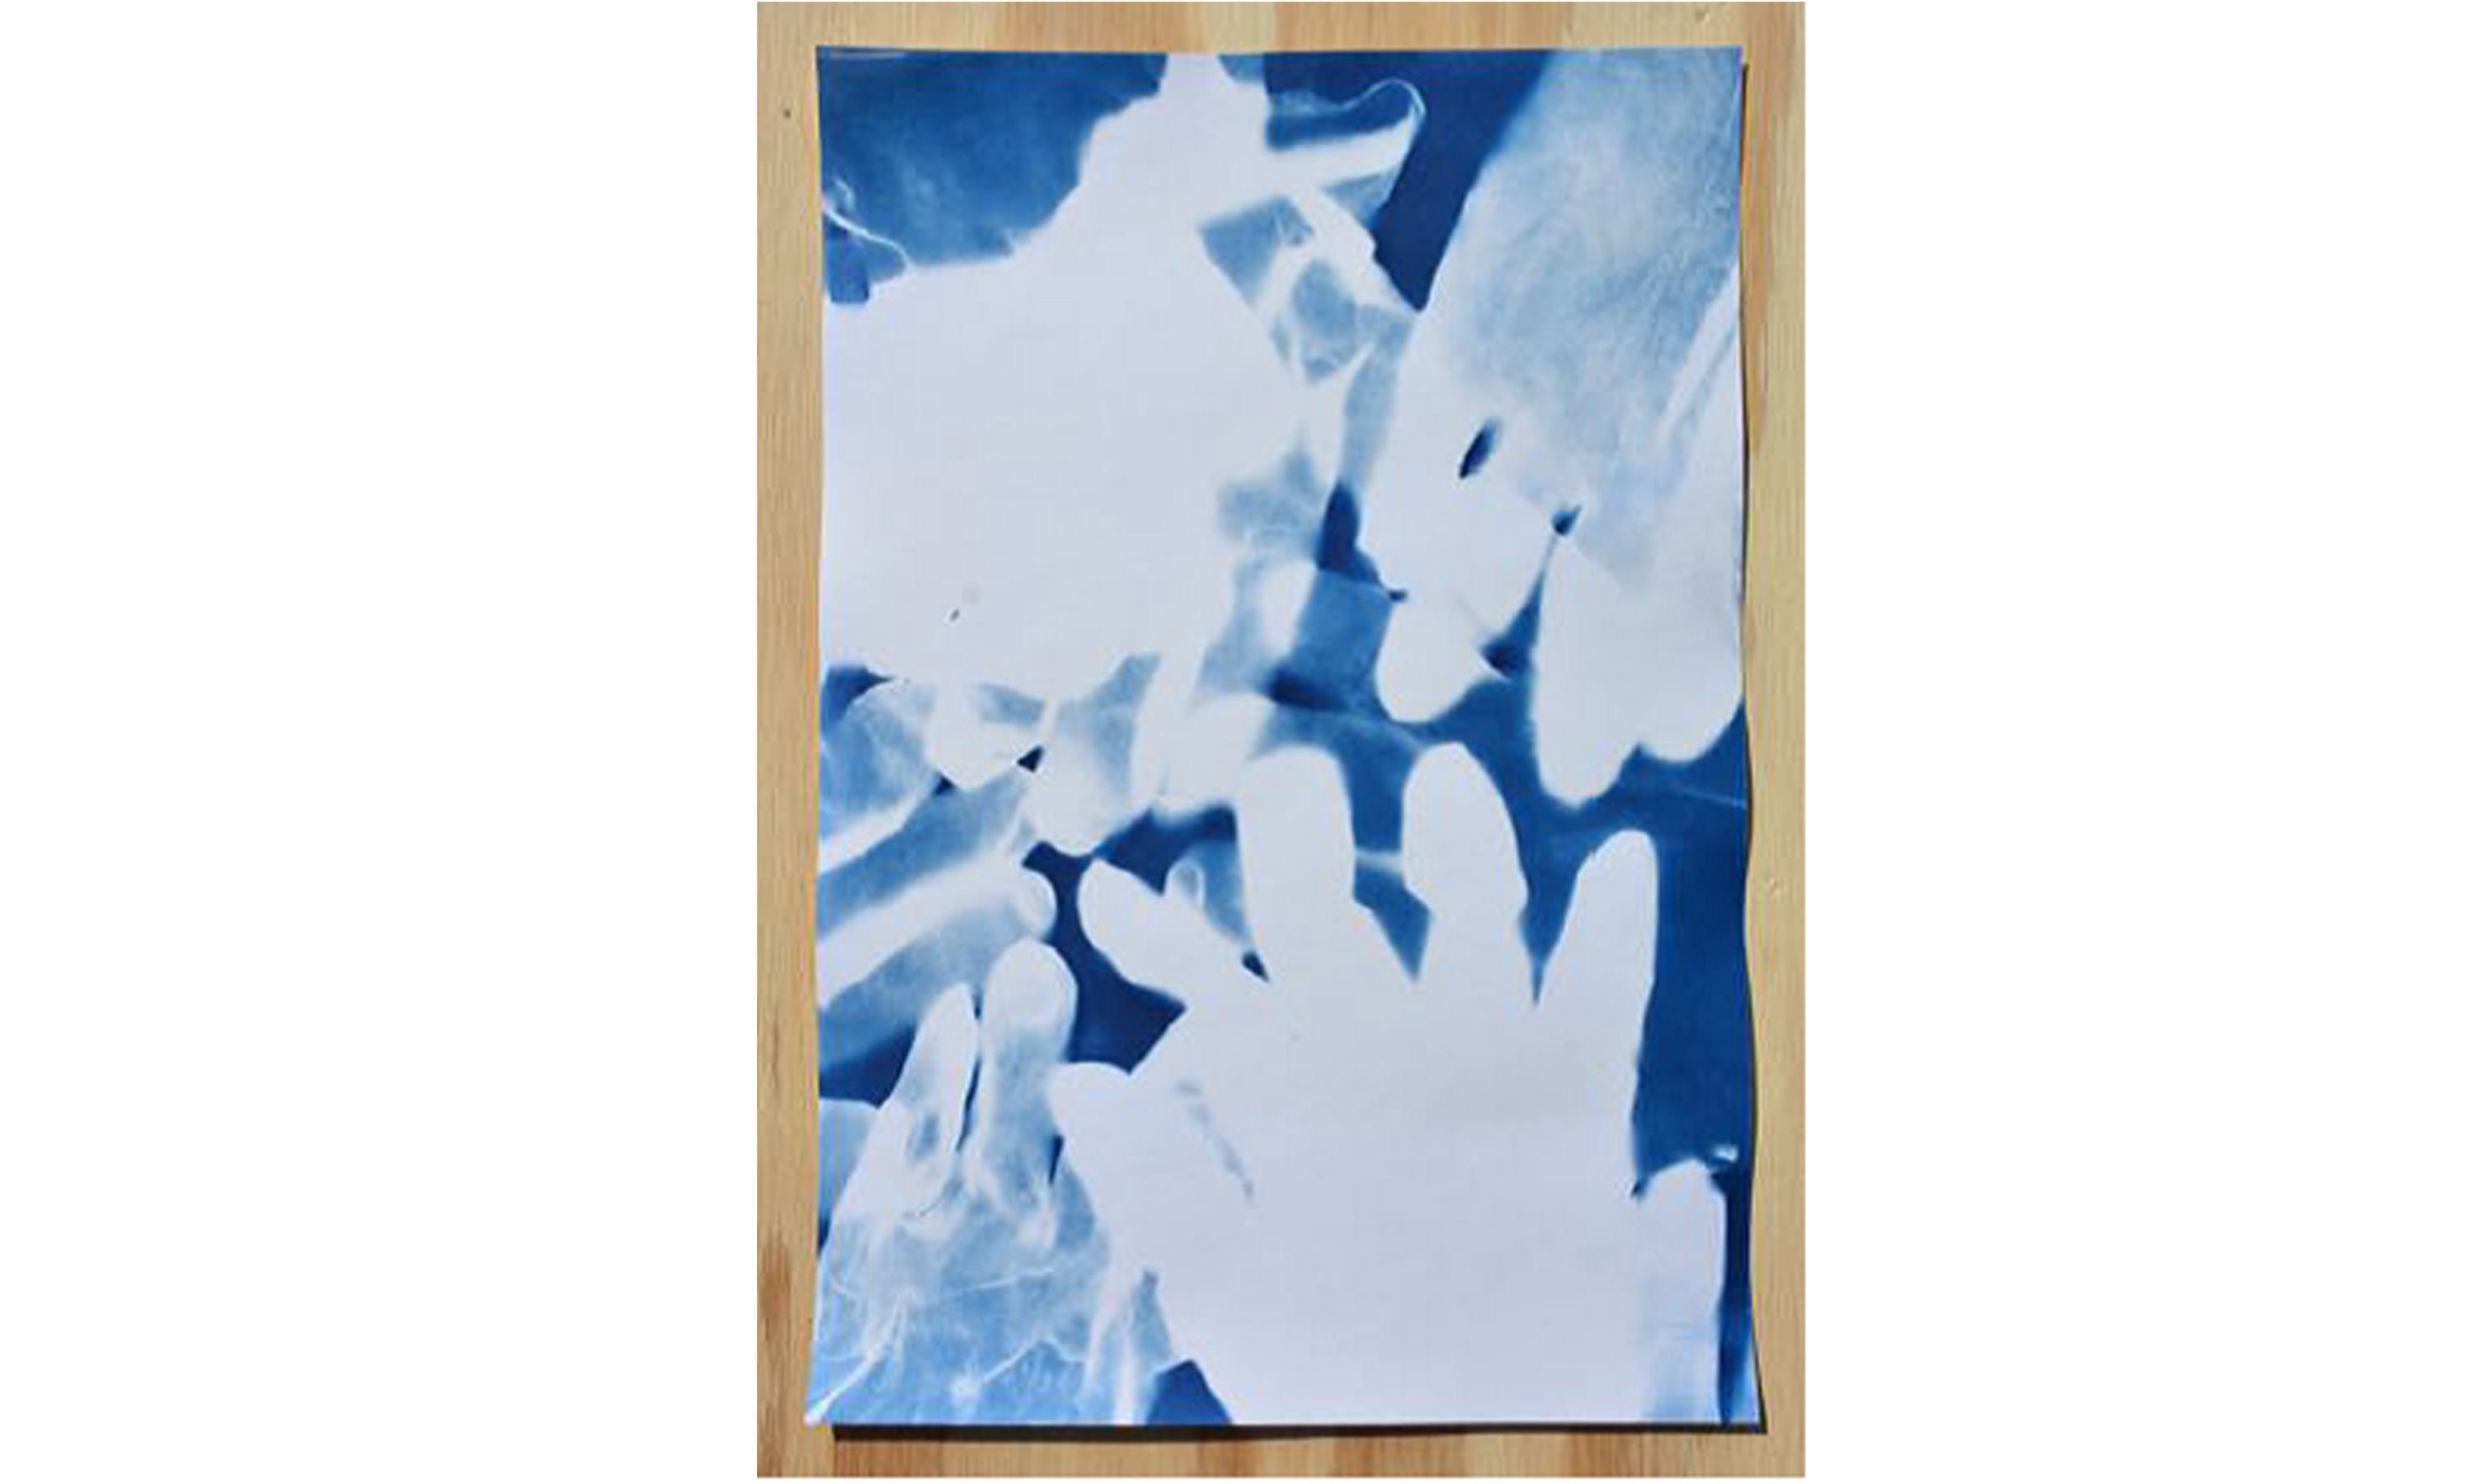
And finally, with our current situation in mind, a print made using personal protective equipment. Art preparators use gloves for many of our tasks, to protect art from the oils and other substances on the skin. These are used nitrile gloves of different colors, each from a different museum I’ve worked in.
With a little preparation, there are many possibilities available to you when it comes to the cyanotype process. Just try things. Cyanotypes will work fairly well on anything made of natural fiber – try painting the solution onto cotton, silk, canvas, or wood and make prints on that. Take a hint from Anna Atkins and make a book of the plants that grow in your yard, or a record of shadows in your room, or a taxonomy of glasses in your cupboard. The whole exposure process is a great thing to try with kids, since the exposure times are pretty fast on a sunny day and all you really need is a sink or a hose. Turn your sidewalk into an art studio!
Comments
Cyanotypes!
Thanks Matt. You've provided such clear instructions and lots of good suggestions. Can't wait to try it out with the kids.
Ink for Printing
Hey Matt, how are you? I just read your blog with a lot of interest as I begin to delve into the cyanotype process and I was wondering what kind of ink you used to print your photograph as a negative? Any piece of advice would help. Thank you so much for sharing your thoughts and input on how you created your art. Hope to hear back from you soon!